http://www.amazon.com/gp/product/B008GOP79G?keywords=isoacoustics&qid=1453940727&ref_=sr_1_1&sr=8-1

HD6 Home Music System w/ Bluetooth aptX-HD
Pro Tip Improve your home theater sound with the HD6 by using Bluetooth or optical input. This approach bypasses inferior audio components in your source device, enabling the HD6's built-in DAC to deliver superior audio quality.
Technical Specifications
General Specifications
Type
Powered Bluetooth aptX HD speaker system
Amplifier Type
Class AB
Power Output
150 W peak power total (50 W RMS / 75 W peak per channel), AES
Drivers
5.5" aramid fiber woofers
1" silk dome tweeters
Inputs
3.5 mm stereo mini-jack, RCA L/R, digital optical (SPDIF,) Bluetooth aptX
Outputs
RCA variable line-out
Input Voltages
115/240 V, 50/60 Hz manually switchable
SNR
>95 dB (typical A-weighted)
THD+N
<0.05% at all power settings
Crosstalk
<50 dB
Frequency Response
50 Hz-22 kHz ±1.5 dB
Frequency Response w/ Bass Reduction Switch selected
N/A
Analog Input Impedence
48K ohms unbalanced (mini-jack and RCA inputs)
Nominal Impedence
N/A
Input Impedence
N/A
Crossover Frequency
N/A
Protection
Output current limiting, thermal over-temperature, power on/off transient protection, replaceable external main fuse
Power Consumption
Idle: 10 W
Mute: 6 W
Sleep: 4 W
Standby Consumption
N/A
Phase
N/A
Recommended Amplifier Power
N/A
Battery Life
N/A
Battery Charge Time
N/A
Bluetooth Specifications
Internal D/A Converter
AKM AK4396
Internal BT Receiver
N/A
Input Bit Depth
24 bit (padded)
Bluetooth Receiver Type
Bluetooth 5.0
Supported Codecs
aptX HD, aptX, AAC, SBC
Supported Bluetooth Profiles
N/A
Wireless Operation Range
Up to 100 ft (30 m) typical
Input Data Rate
Determined by Bluetooth
Wireless Latency
~30 milliseconds (ms)
Usb Specifications
Connector Type
N/A
USB Device Class
N/A
Input Bit Depth
N/A
Input Sample Rate
N/A
Headphone Amp Specifications
Headphone Amp Type
N/A
Full-scale Headphone Output Level
N/A
Output Impedence
N/A
Recommended Headphone Impedence Level
N/A
Optical Specifications
Internal D/A converter
AKM AK4396
Input Bit Depth
up to 24 bit native
Sample Rate
up to 192 kHz native
Weights And Measures
Dimensions (HWD)
Left speaker (active)
Dimensions: 7.25" (18.5 cm) x 11.75" (30 cm) x 10" (25 cm)
Right speaker (passive)
Dimensions: 7.25" (18.5 cm) x 11.75" (30 cm) x 10" (25 cm)
Weight
Left (active) - 17.5 lb (8 kg)
Right (passive) - 12.5 lb (5.5 kg)
Total Shipping Weight
33.5 lb (15 kg)
Shipping Box Dimensions (LWH)
20" (51 cm) x 15" (38 cm) x 17" (43 cm)
Environmental Requirements
Operating temperature: 32 degrees F to 95 degrees F
Non-operating temperature: -4 degrees F to 113 degrees F
Relative humidity: 5% to 95% non-condensing
Materials And Construction
0.7" (18 mm) thick MDF cabinets with real wood veneer
1" (26 mm) silk dome tweeters with neodymium magnets
5.5" (140 mm) aramid fiber woofers with advanced voice coils
Cabinets
To minimize unwanted resonances and distortion, Audioengine cabinets have thick high-resin MDF walls with extensive internal bracing. Heavy internal sound-damping material is used to reduce unwanted sound reflections inside the cabinet. All cabinet edges are rounded which look great and reduce high-frequency diffraction effects on the front baffles. The HD5 cabinet contains tuned, rear-port slots.
Furniture Grade Finishes
HD5 cabinets are available in several handsome finishes, including walnut and cherry veneers as well as satin black and high-gloss white paint, offering a myriad of options for complementing room furnishings. Also included are detachable grills that add further aesthetic advantages as they are firmly held in place with hidden neodymium magnets for a clean look.
Custom Components
Audioengine designs and manufactures our own tweeters, woofers, and other critical components. In other words, these are not “box built” speakers with off-the-shelf parts but custom-designed to our specifications. What we do not fabricate directly in our factory we have made to our designs (parts such as transformers, magnets, and wiring harnesses, for example). The cabinets, drivers, bass port designs, amplifiers, and crossovers are all painstakingly tuned together for each Audioengine model. This, in turn, makes for a much more efficient system that requires much less power than passive speakers and a separate integrated amplifier or similar A/V components.
Based On Studio Monitor Designs
Studio monitor speakers are used by producers and engineers in recording and production studios. They are designed with a theoretical flat frequency response which allows the engineer to create a final mix in such a way that the recorded music will sound good on most other speakers. Although Audioengine speakers are not designed to be up-close “nearfield” studio monitors, we do carry over much of the same higher-end technology, components, and design philosophy for all Audioengine speaker systems.
Efficient Integrated Design
The speaker cabinets, drivers, innovative bass port designs, amplifiers, and passive crossovers are all critically tuned together for each Audioengine model. This, in turn, makes for a much more efficient system that requires less power than passive speakers and a separate integrated amplifier or similar A/V components. We build all this goodness into the left speaker cabinet to make it super-easy to connect your smartphone, tablet, computer, TV, network player or any other audio product.
High-quality Bluetooth Audio
The Bluetooth built into the HD5 powered speakers features aptX HD coding which is an advanced Bluetooth audio codec with very impressive sound. And even if your phone or tablet does not have aptX HD, the HD5 Bluetooth solution is backwards-compatible with SBC and AAC codecs, as well as standard aptX, so you can wirelessly stream music from any Bluetooth-enabled device and still enjoy all your music. High-fidelity Bluetooth aptX HD that really works and sounds great. Here is why:
Extended-range wireless.
Most Bluetooth implementations have very limited range, typically within just one room. But with careful signal management circuitry and antenna tuning, we offer a superior solution that has up to 3 times the range of standard Bluetooth for multi-room use, with no degradation in audio quality.
Most Bluetooth implementations have very limited range, typically within just one room. But with careful signal management circuitry and antenna tuning, we offer a superior solution that has up to 3 times the range of standard Bluetooth for multi-room use, with no degradation in audio quality.
24 bit DAC
The HD5 include an AKM AK4396A DAC, widely known for its low-noise and high-fidelity. The optical input configures the AK4396A as a bit-perfect 24 bit DAC, which will process sample rates up to 192kHz natively. But for Bluetooth the AK4396A is used as an upsampling DAC and will pad all bit depths to 24 bit, achieving a higher signal-to-noise ratio and lower noise floor. Due to the high signal-to-noise specs of the AK4396A, the fact that digital signal is upsampled to 24 bit as well as the added benefit of onboard triple redundancy power source conversion and filtering, the HD5 Bluetooth implementation presents impressive low noise and low distortion characteristics with a noticeable improvement over other Bluetooth devices.
Amplifier Design
The amplifiers in powered Audioengine speakers are located in the left speaker and are a conservatively-rated class A/B analog monoblock design. This is a more traditional speaker/amplifier marriage which provides excellent quality audio and greater flexibility. All circuit boards for the power and preamp sections are vertically mounted for maximum mechanical shock protection.
Driver Designs
Audioengine uses audiophile-quality, ferrofluid-cooled silk dome tweeters with neodymium magnets. Silk tweeters hold up well under high power and the edge-driven design gives very smooth response. The woofers are aramid fiber woven glass composite with rubber surrounds. Aramid fiber is obviously very strong, which means the woofer retains its shape when being driven at high levels. The HD5 woofers are housed in cast aluminum frames which provide high rigidity and increased heat dispersion.
Power Transformers
Power transformers are critical to to high-quality audio performance, especially in the low-end and again, no off-the-shelf parts. Audioengine uses gapless core toroidal transformers which have a tighter radiated magnetic field, translating to lower noise. They are lighter than standard, lower-cost transformers and also generate less heat.
Shielding
Both drivers are directly video shielded and allow the user to place the speakers within a few inches of a video monitor. This shielding also offers protection for hard-drive digital music players.
Quickstart Guide
HD6 Quick SetupStep 1: Connect the speaker wire from the HD6 left (powered) speaker to the right (passive) speaker.
Step 2: Connect the wireless antenna to the HD6 rear panel.
Step 3: Connect the power cable to the HD6 rear panel and plug the other end into an AC power outlet.
Wireless Connection
Step 4: Turn on the HD6 power switch located on the rear panel. HD6 will automatically go into Bluetooth "pair mode" and the Pair button on the HD6 rear panel should start flashing.
Step 5: On your device (phone, tablet, laptop, etc), turn on Bluetooth and go to Bluetooth preferences.
Step 6: Select "Audioengine HD6" to pair and connect. The Pair indicator on the HD6 rear panel should be solid.
Play your music and adjust volume levels on HD6 and your device.
Step 7: To add additional devices put HD6 back into pair mode by disconnecting HD6 from your device or by pressing and holding the Pair button on the HD6 rear panel until the pair indicator starts flashing.
HD6 can wirelessly connect to only one device at a time, however it will remember up to six different devices.
Wired Connection
Step 8: Connect one of the included audio cables to your music player (phone, tablet, computer, TV, etc) and the other end to an input on the HD6 rear panel.
Step 9: Play your music and adjust the volume on the speakers and your device to the desired listening levels.
For the full setup guide, download the attached PDF
HD6 quickstart guide_V01-WEB
HD6 Setup Video
Troubleshooting
HD6 Troubleshooting TipsThe following troubleshooting tips can help diagnose and correct most concerns with the HD6. We have attempted to make this list as comprehensive as possible, so some of these may not apply to your issue, but please go through each tip.
If the power indicator on the HD6 front panel is not illuminated, then try these tips:
- Verify that the AC power cord is connected to the speaker rear panel and to a working AC power outlet.
- Check that the speaker’s power switch is in the ON position.
- Check that the rear panel voltage selector matches the operating voltage in your country or region.
- If there is still no power, check the fuse in the rear panel. If the fuse is blown and needs to be replaced it is important to replace with same fuse type and value.
If the front panel indicator light is on but you are experiencing an audio-related or other issue, try these tips:
- Power-cycle the speakers by switching them off and back on using the power switch on the rear panel.
- Be sure the speakers are not in MUTE or SLEEP mode (if so, the front panel indicator light will be flashing).
- Check that the cables from your audio sources to the speaker are properly connected. Confirm by unplugging the audio cables and then reconnecting. Try using as many different inputs and input sources as possible to see if the problem follows.
- Check speaker wire connections from the left (powered) speaker to the right (passive) speaker. Confirm by removing the speaker wire from on each speaker and reconnecting. Also check speaker wire polarity by verifying that the wires are going to same terminals on both speakers.
- Verify that your audio input source components or devices are all powered on and the volume levels are turned up.
- If using a computer, verify that the audio output balance setting is centered for the OS and all apps.
- Make sure the speakers are not too close to a wall or other obstruction, which could limit bass output.
- Decrease the volume level of the audio input source and increase the volume of the speakers.
- If you are using a wireless adapter, preamp, or external DAC with these speakers, remove these (temporarily) and connect the audio source directly to the speakers.
- If your input source has its own EQ or other sound settings, make sure they are all (temporarily) turned off.
- Also try moving the speakers to a different location to see if something is causing interference in the current location. Something as simple as a wireless internet router, cordless or mobile phone, or halogen lamp near the speakers can all cause interference.
HD6 troubleshooting tips - Bluetooth
- Verify that the HD6 is connected to power and the rear panel power switch is turned on. If you haven’t already, power-cycle your speakers by switching them off and back on.
- If your HD6 is already connected to a device via Bluetooth, the Bluetooth Pair light on the rear panel of the left speaker will be on and solid (note that if your HD6 has been idle and not connected to a device for more than 2 minutes, the Pair light will automatically turn off). Tap the Pair button and it should begin blinking (or pair to your HD6 using your source device, and the LED will go from off to on and solid).
- Try playing audio from more than one application on your phone/tablet, or computer.
- Check to make sure your source device (computer, tablet, phone, etc) is running the most up-to-date version of software available. For Mac OS users, be sure to check the App store to see if there's a newer version of Mac OS you could be running.
- Try disconnecting from and forgetting the HD6 through your device’s Bluetooth settings, and re-pairing to the HD6.
- Try using a different source device with your HD6 to see if the issue follows. Also be sure to test your HD6 using the analog input as well.
- If possible, try your HD6 in a different location to see if something is causing an issue in the current setup. Something as simple as a wireless internet router, cordless or mobile phone, or halogen lamp near the speakers may be causing interference in your setup.
HD6 troubleshooting tips - remote control
Remote control is not working or remote range is reduced.
- Make sure nothing is blocking the remote control receiver, which is in the left powered speaker.
- Check the remote battery to be sure it is installed correctly.
- Replace the battery with another CR2025 battery
FAQ's
Can Alexa Connect to Bluetooth Speakers?
Remember how in old science fiction movies a character could just talk out loud to a spaceship and it would do anything they commanded?
The idea of voice control technology has long been embedded in our expectations for the “future”, and even though most of those old science fiction movie-makers couldn’t imagine computers any further-advanced than those already available in 1979, they certainly hit the nail on the head with their forecast of voice control. Nowadays, with the help of products like Amazon Echo (and its voice-controlled personal assistant ‘Alexa’), users can control aspects of their home just by verbalizing simple commands. But even with the huge strides this technology has made in recent years, it’s impossible to get audiophile-quality sound from the speakers in an Amazon Echo product. Audioengine can help with this, but before we dive into how, let’s talk a little more about the Amazon Echo.
Is your Amazon Echo killing your audio quality?
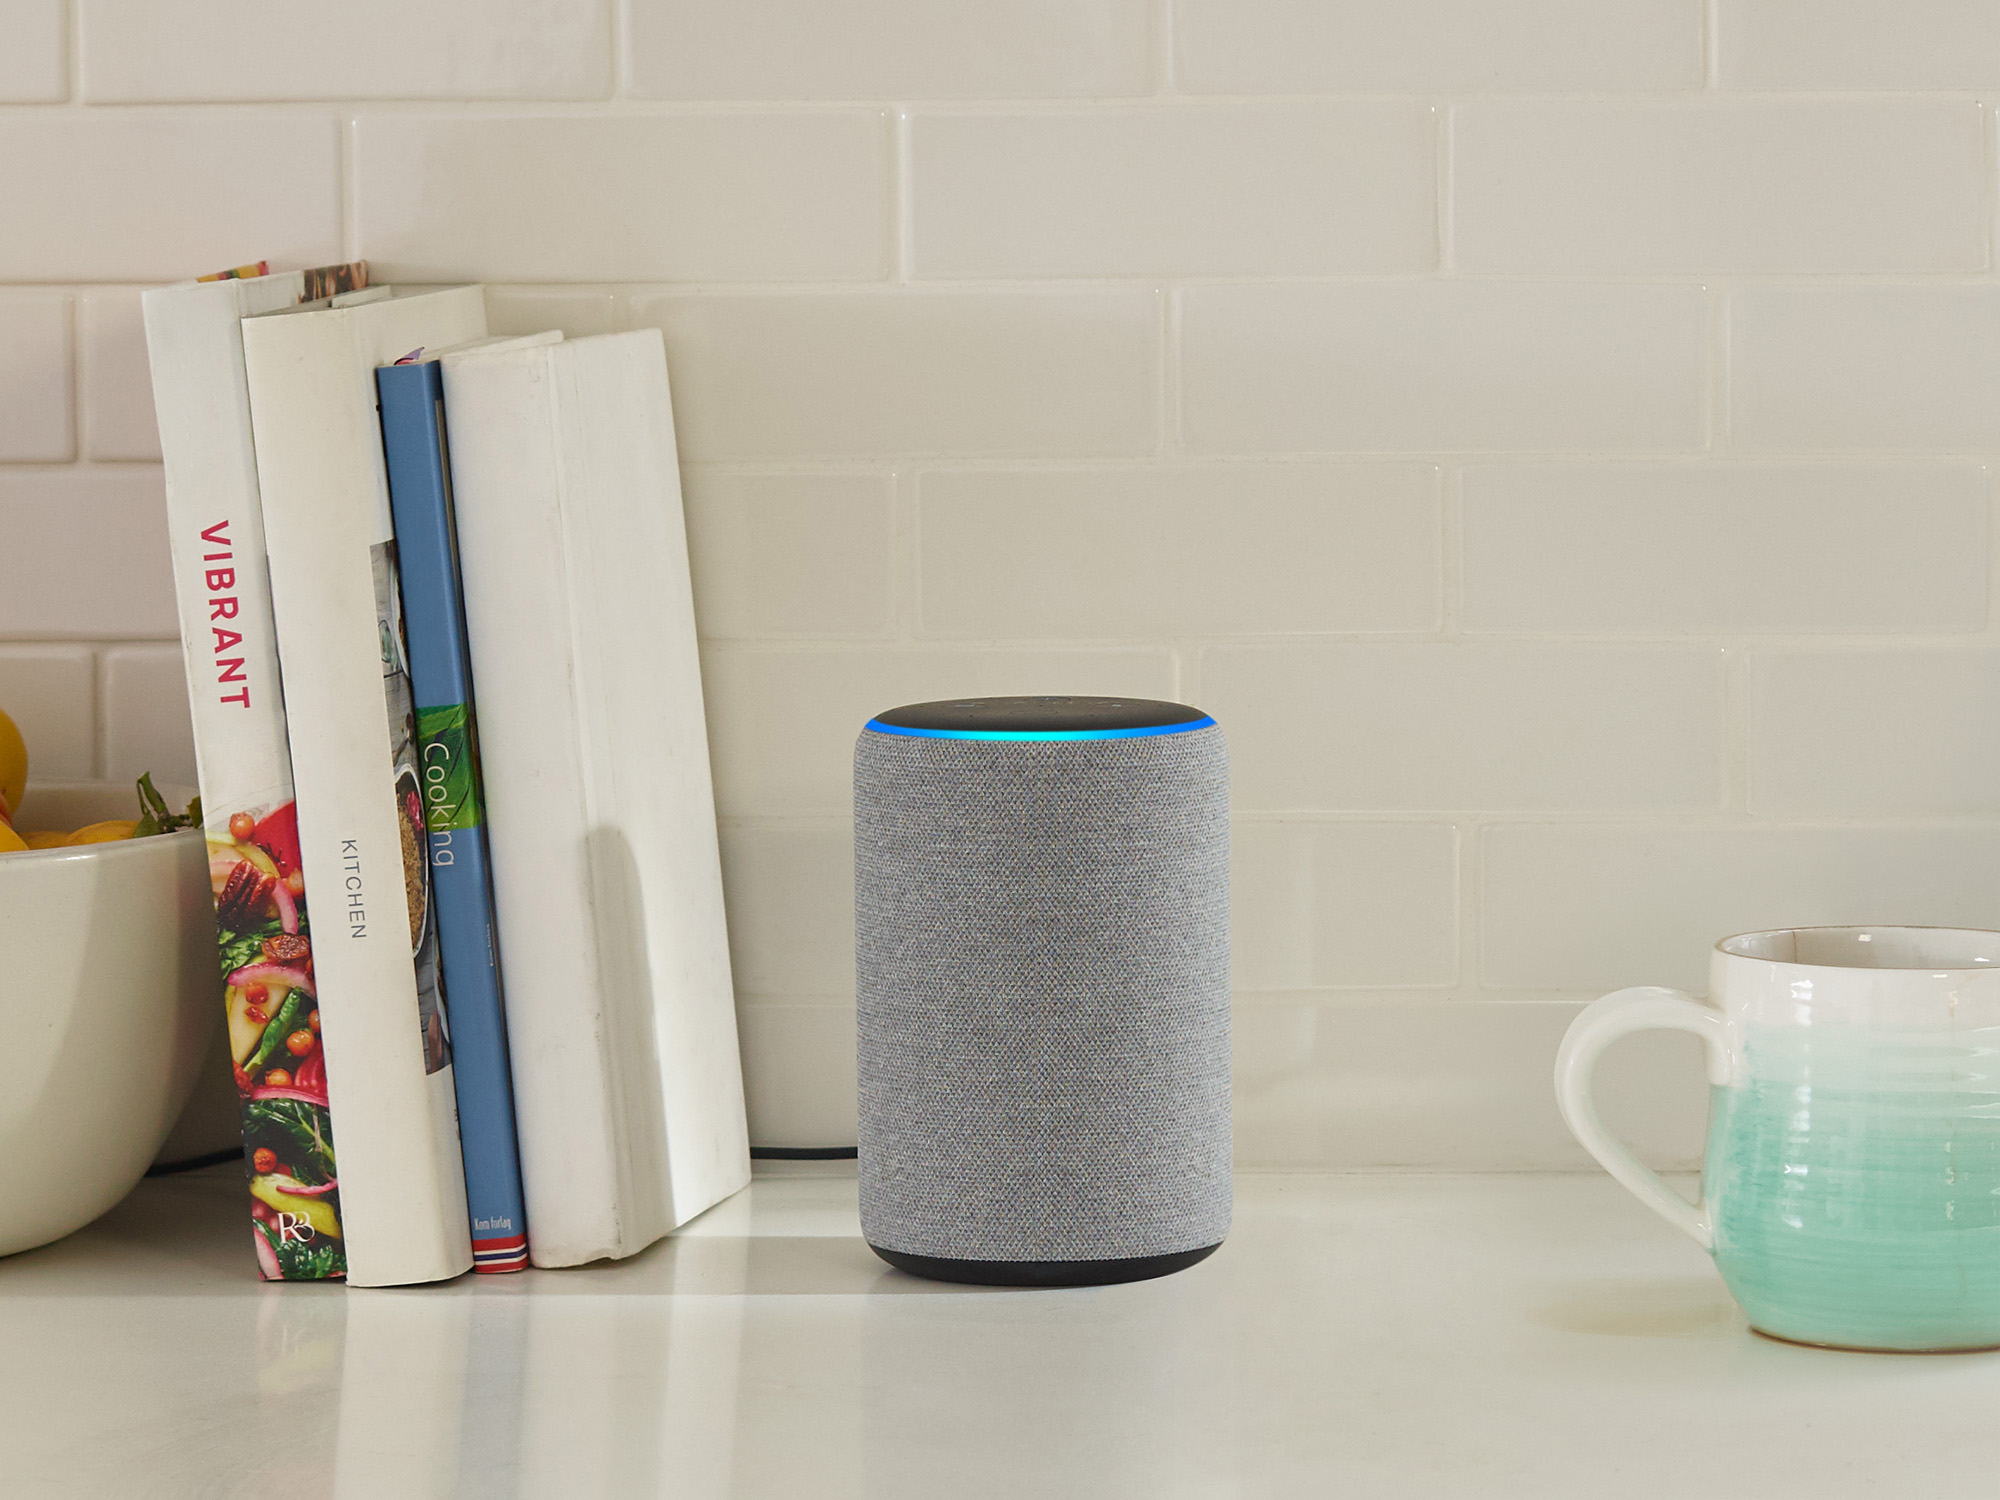
First, while Echo and Alexa do in fact go hand-in-hand, they are not the exact same thing.
Echo is a line of smart speakers manufactured by Amazon, and Alexa is an intelligent personal assistant software used to control Echo. Users can speak aloud to give Alexa, and therefore Echo, verbal commands (always beginning with the wake word, ‘Alexa’) such as, “Alexa, play my favorite song,” or “Alexa, what’s on my calendar this Saturday?” Alexa will respond accordingly, so long as the questions asked or commands given are within Alexa’s realm of capability. With tons of Echo-compatible add-on products on the market, there really isn’t a whole lot that falls outside of Alexa’s wheelhouse.
The most common commands Alexa handles are music-related: whether it’s calling up a Spotify playlist, turning up or down the volume, or finding a specific song you haven’t heard in years but are randomly thinking about and absolutely have to hear right this second!! The accessibility is astounding, no doubt, but its main consequence is that you are forced to listen to all your music on Echo’s built-in speakers instead of your own beastly audio system. This is not to say Amazon has ignored their sound quality altogether, but realistically there’s only so much a single speaker housing of that size can handle. Suffice it to say, there are limitations.

Luckily, Amazon has implemented a crucial feature which expands its functionality to accommodate customers who want to be able to interact with Alexa and still enjoy listening to podcasts, music, and stock tips through exterior systems. That’s right, it’s quick and easy to connect your Echo to Bluetooth speakers:
- Open the Alexa App (Apple link | Google Play Link)
- Tap the “Devices” icon and select the Echo device you want to connect to speakers
- Select “Bluetooth Devices”
- Select “Pair New Device”
- Find your Audioengine Wireless speaker on the list of available Bluetooth devices
Bang, you’re done!
Now you can treat Alexa as if it were any other input device; you can still have whatever other devices you so choose connected to your Audioengine speakers, and since Alexa can control Echo’s volume with a simple, “Alexa turn down volume,” you can leave Audioengine’s volume knob exactly where you like it and adjust volume accordingly with Alexa. If you have our S8 Powered Subwoofer connected wirelessly to your mains, this configuration will still work which means you’ll get full-spectrum high fidelity audio when listening to all your favorite songs, without sacrificing the unparalleled convenience provided by a product like Amazon Echo. This will also work with our standalone B1 Bluetooth Music Receiver in the event you have a set of wired speakers you want to turn into wireless speakers.
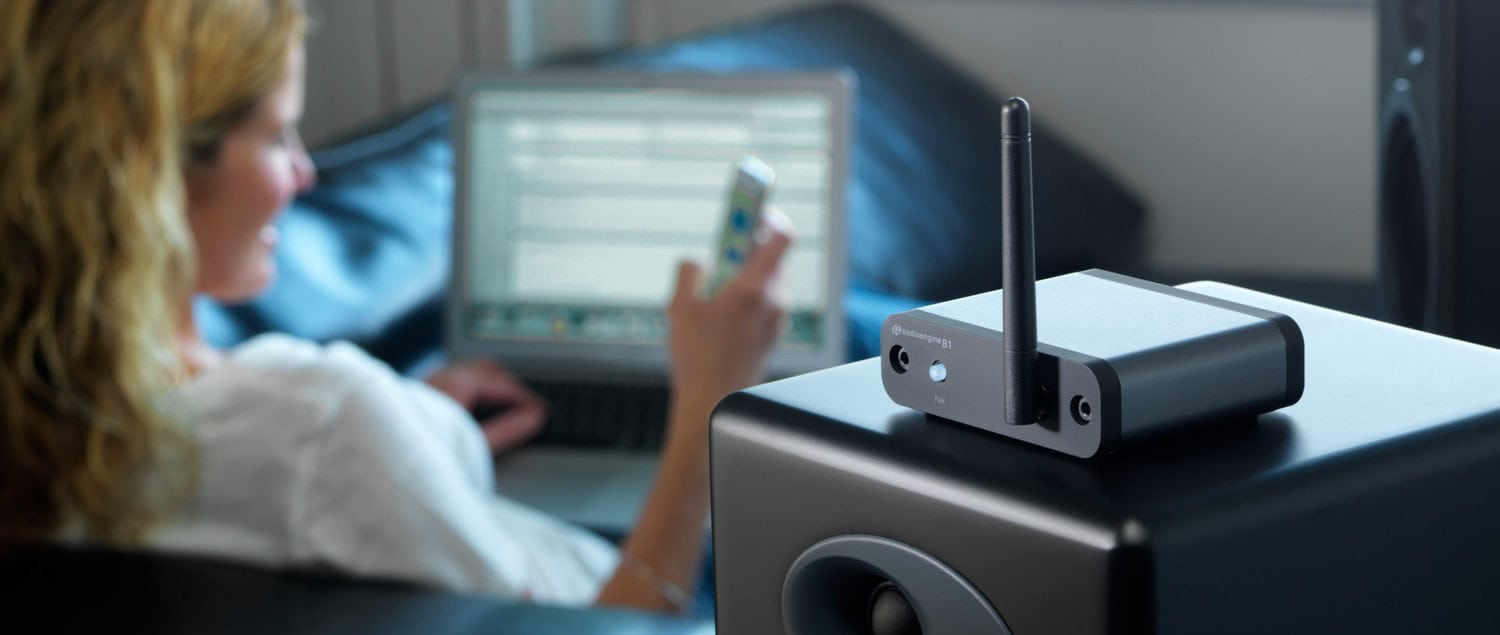
Modern technology is really opening up doors... and windows... and exhaust fans... it’s basically blasting the roof off the whole place.
We are reaching the point where we can do just about anything we want with voice control technology, as long as we have all the right accouterments. Products like Amazon Echo make life so easy it hurts... perhaps it hurts so good that you want to lie down and say, “Alexa, play ‘Hurts So Good’ by John Mellencamp.” Don’t worry – we designed Audioengine Wireless speakers to do the rest.
Connecting Google Home to Bluetooth Speakers
Consumer electronics designers are, and have been, on a perpetual quest to give users the most streamlined experience imaginable.
At this point in time it seems like modern-day designers have exceeded the bounds of what most of us could have ever imagined in the first place. Think about it, there is an app for literally everything; just by downloading a simple program onto your phone or tablet, your life can become easier. Wearable technology, like Apple Watch, and smart speakers, like Google Home, tie all of your electronics together to make technology and user-friendliness a lifestyle rather than a rare luxury. Today we are going to talk a little more about one of the leading products, what it does, and how Audioengine can take it one step further; that product is Google Home.
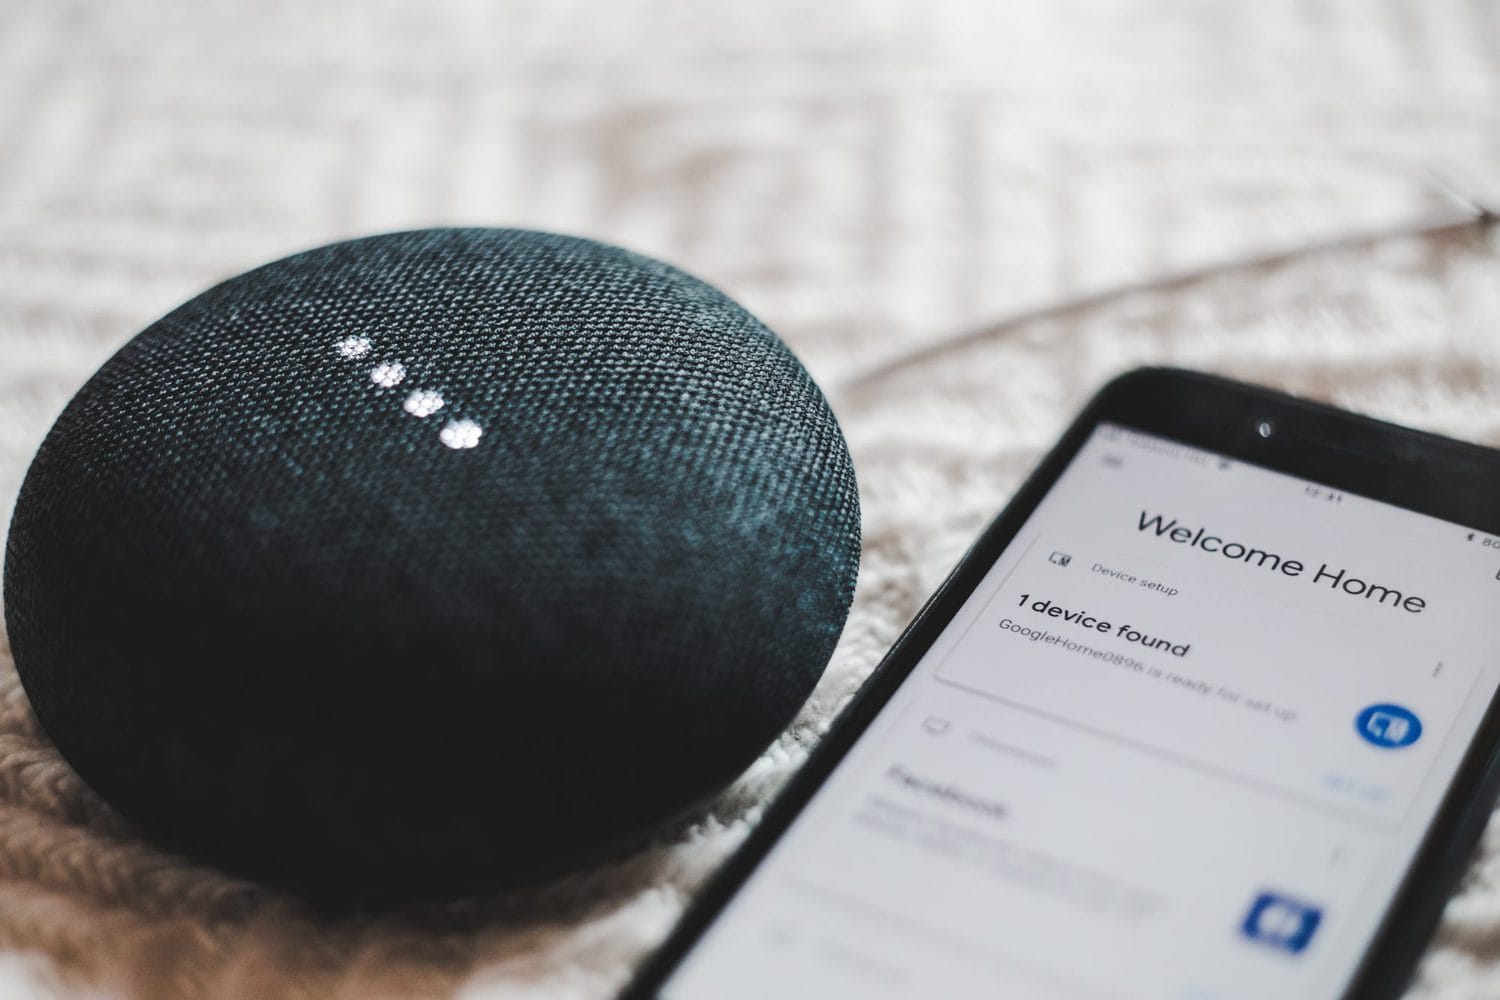
What Is Google Home?
Offically, this piece of technology is touted as a “Smart Speaker and Home Assistant.”
A smart speaker is one of those sleek futuristic speakers that sits on your friend’s kitchen counter, plays whatever music someone tells it to, and sometimes has a snarky robotic comeback to your sarcastic remarks. There are a number of big brands making smart speakers (some of which we’ll discuss in other articles) and all of them have their pros and cons. One “pro” to the Google Home is the “Home Assistant” part. Google Home has an accompanying downloadable app that allows users to customize how the device interacts with and controls their home; lights, thermostats, coffee makers, and pretty much anything else can be controlled by Google Home and accessories. Once you have all of your desired devices properly connected and configured, turning them on and off is just one voice command away... how much easier can life get?
When it comes to music, smart speakers make calling up the right tune an absolute breeze. Google Home can control apps such as Spotify, YouTube, and iHeartRadio among others, so you can tell it to play just about any song in the world. Google Home will even call up playlists you’ve saved within your music streaming apps, and you can tell the device to increase and decrease volume, pause, skip, and any other command you would typically give a media player. There is just one drawback; while Google Home offers a few different sizes (featuring different speakers), the product’s focus is not audiophile-grade sound quality. For that, we need to bring Audioengine into the mix.
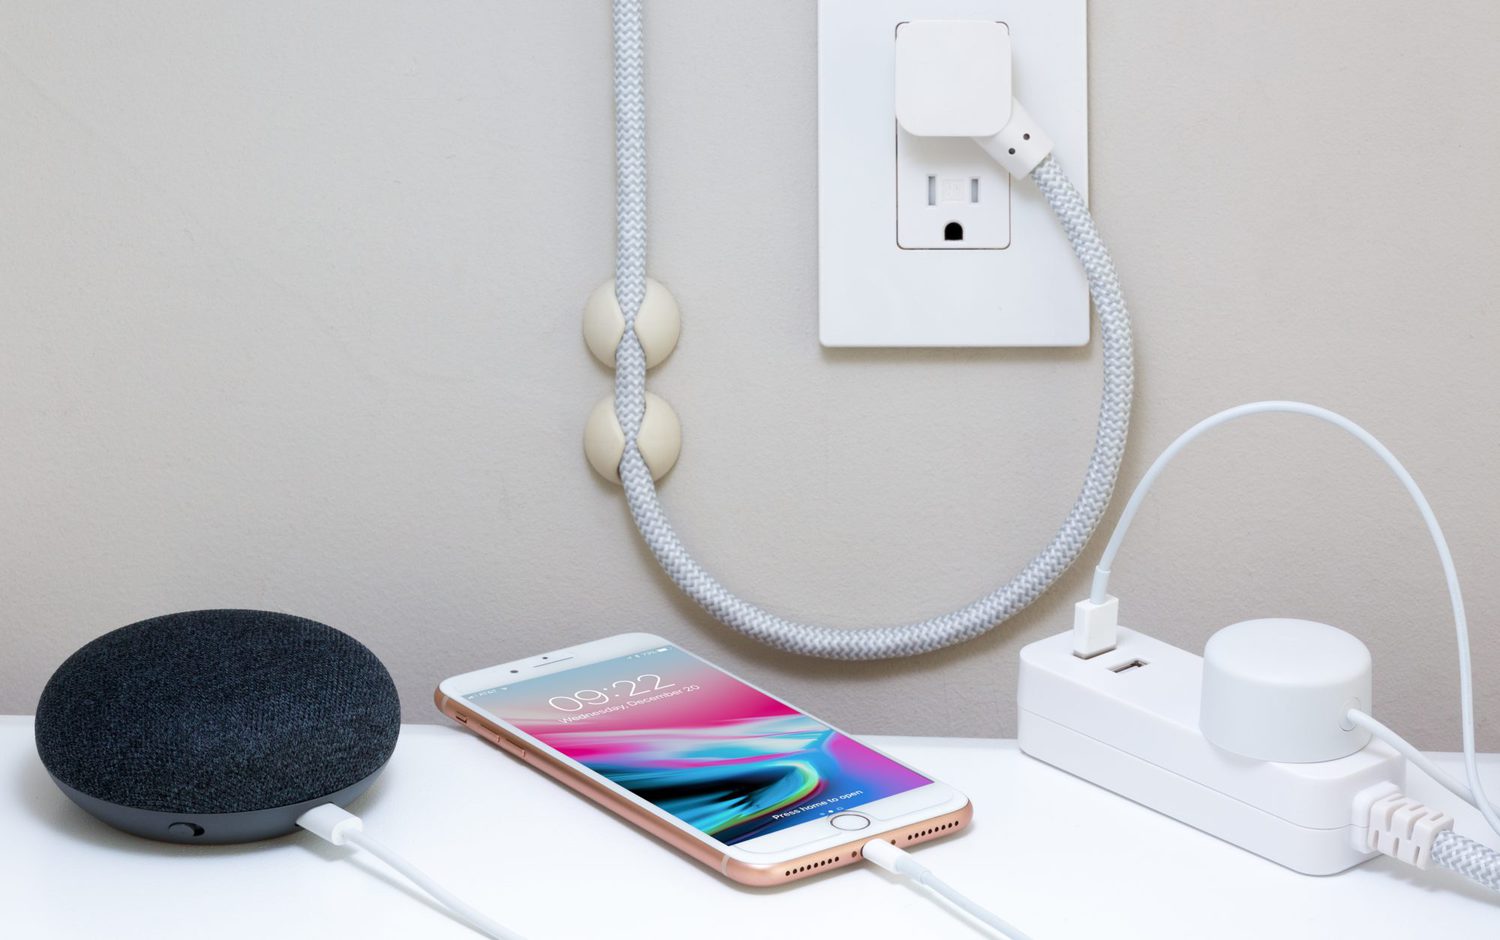
How Can Audioengine Take Google Home Further?
You’re taking a step up in the world of consumer electronics and you’ve decided to purchase Google Home; you care about user-experience and you strive to stay ahead of the pop culture curve. That doesn’t mean you have to sacrifice a quality listening experience. As I always say, what good is having access to every song in the world if you’re just going to play them through an inadequate sound system? That’s like sharpening a hunting knife so you can cut hot butter with it.
Luckily, the Google Home App (iTunes | Google Play) allows users to send audio to external Bluetooth speakers. Whether it’s the humble B2 Wireless Speaker, or a full-fledged pair of active Audioengine speakers such as the A5+ Wireless, Google Home is capable of transmitting your beloved music to your sonic system. Bam!!--we just completed the full circle of user-friendliness and ear-friendliness. It may sound complicated merely by description, but it’s actually extremely easy to configure, just follow the quick steps below:
- Download and open the Google Home App on your phone or tablet.
- Navigate to the “Devices” tab within the app
- Tap “Settings” in the devices submenu
- Scroll down to “Default Music Speaker” and tap “Pair Bluetooth Speaker”
- Select your Audioengine speaker – and you’re done!
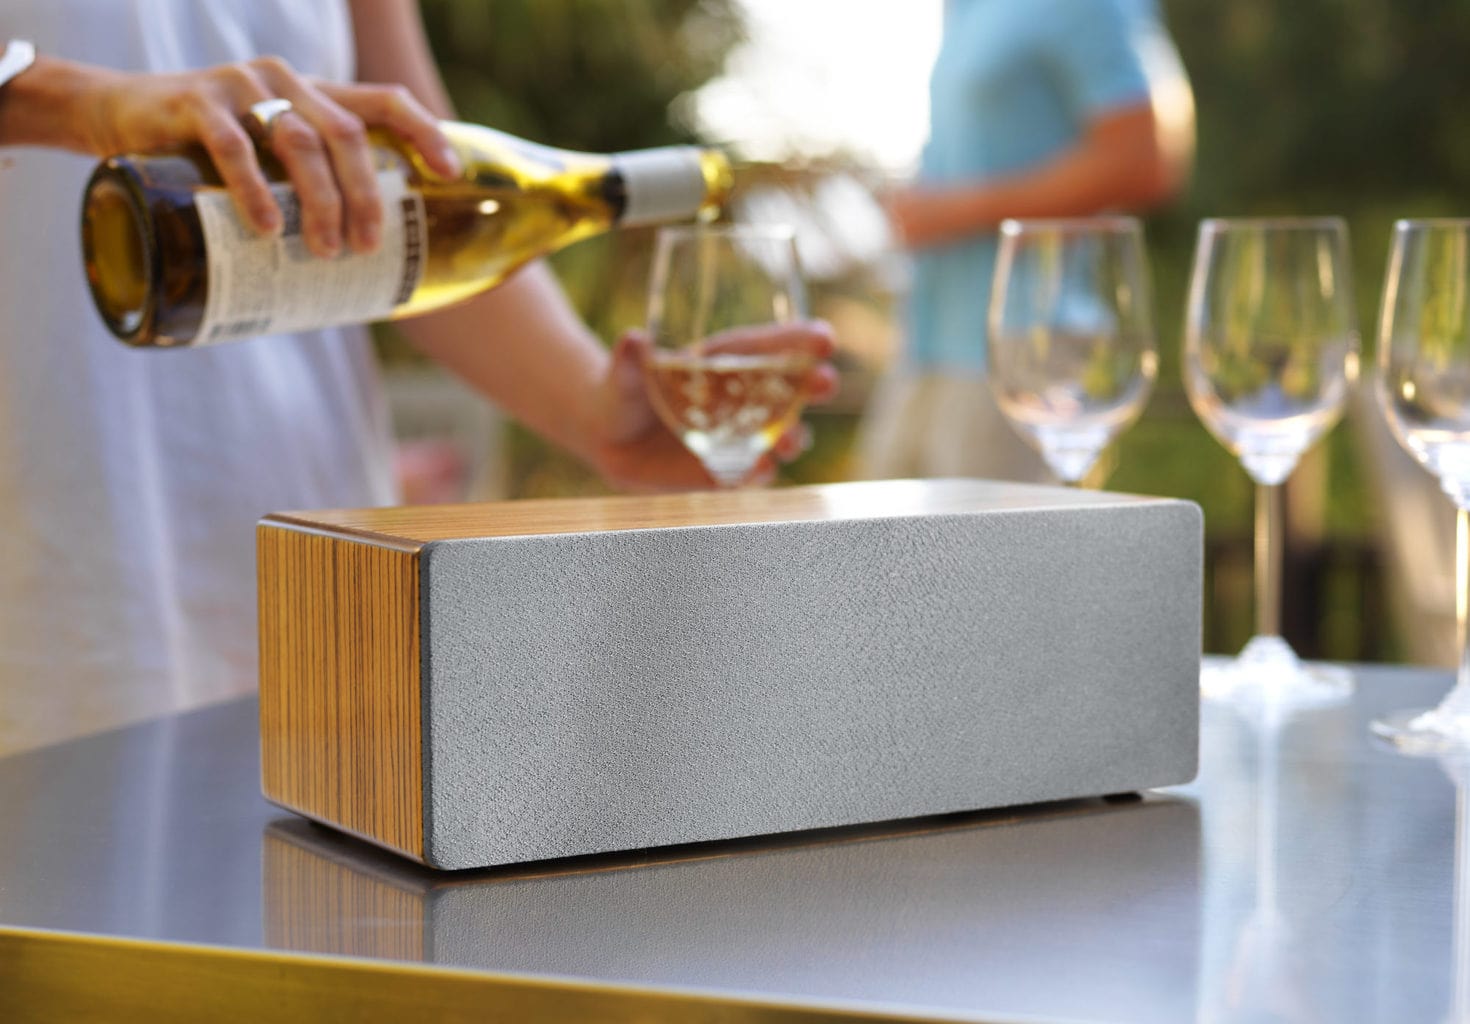
Take control of your music.
Now you’re ready to shout voice commands all over the house and rock out while you make dinner, host a party, or do whatever it is you do. You can even connect multiple sets of Audioengine wireless speakers for multi-room audio, by creating “groups” in the Google Home app (under that same “Devices” tab).
Isn’t it nice that designers have created all this awesome technology for us? Now I’m just spit-balling, here, but -- what if one day someone will make some kind of like a smart speaker... except it lives in your brain and reads your mind. Then you can just think about how good your favorite tunes will sound through a pair of Audioengine wireless speakers, and voila!
Experiencing static or buzzing in your home music system?
Whether you're using the renowned Audioengine A2+ or another high-end audio setup, understanding the root causes of these noises is essential for a pristine listening experience. This guide delves into common sources of disturbances and offers effective strategies to eradicate them.
Why Are My Speakers Buzzing?
1. Static, Buzzing, and Ground Loops
Unwanted sounds in your audio setup, like static, buzzing, or humming, can stem from various sources. These include your computer's 3.5mm line out, RF interference, or the noise floor inherent in electronic devices. Ground loops are a frequent issue in systems where the audio source and speakers are on different power sources, such as separate power strips.
Solution:
To address ground loops, ensure all components of your audio system are connected to the same power strip or power source. This helps maintain a common ground and prevents ground loops. Using a ground loop isolator can also be effective in eliminating this issue.
2. Static from the 3.5mm Line Out
Static from the 3.5mm line out of a computer is a common issue. This often occurs due to electromagnetic interference (EMI) from other devices or poor quality cables.
Solution:
To reduce static, use high-quality shielded cables. Keeping cables away from power supplies and other electronic devices can also minimize interference. Alternatively, consider using an external digital-to-analog converter (DAC) to bypass the computer’s internal sound card, which is often a source of static.
3. RF Interference
Electronic devices in your home, such as routers, mobile phones, and even microwaves, can cause radio frequency interference (RFI), leading to that annoying buzz.
Solution:
To mitigate RF interference, position your audio setup away from other electronic devices. Using ferrite beads on cables can help suppress high-frequency noise. Additionally, ensuring your audio cables are of high quality and shielded can further reduce susceptibility to RF interference.
4. The Noise Floor
Every electronic device, including your home music system, has a baseline noise level known as the noise floor. When the system is amplified, this noise floor can become noticeable.
Solution:
To minimize the impact of the noise floor, keep your audio system’s volume at a reasonable level and adjust the gain settings appropriately. Ensuring your equipment is well-maintained and free from dust can also help, as dust can affect the performance of electronic components.
How Do I Fix My Speakers?

Eliminating buzzing noises and static involves a combination of savvy technical solutions and simple setup adjustments:
Invest in Quality Cables: High-quality, shielded cables, especially for your 3.5mm line out, can significantly reduce electromagnetic interference.
Strategic Placement of Equipment: Keep your speakers away from potential sources of RF interference, such as a cellphone.
Unified Power Sources: Connecting your audio source and system to the same power strip can help resolve ground loop issues.
Regular Maintenance: Dust and debris can affect connections, leading to static. Keep your connectors and ports clean to maintain a clear signal path.
External DAC for Enhanced Audio: Consider using an external Digital-to-Analog Converter (DAC). Digital to Analog converters work by converting digital audio files back into analog sound, to be heard the way the artist intended. DAC’s such as the Audioengine D1 feature 32-bit audio processing technology and are particularly effective in reducing the noise floor compared to devices with built-in sound cards.
Conclusion
Static, buzzing, and grounding issues can disrupt your music enjoyment, but they don't have to be a permanent feature of your audio experience. With the right understanding and some adjustments, your home music system will deliver the high-quality sound you expect. Embrace the journey with Audioengine – where we combine state-of-the-art technology with user-friendly solutions to elevate your audio experience.
6 Simple Wireless Speaker Shopping Tips
So you’ve decided to make the leap from wired to wireless music and might have made the mistake of Googling “Best Wireless Speakers.”

We here at Audioengine know how overwhelming this can be and we extend our deepest sympathies. But it’s time to put your concerns to rest as we’re here to give you some important buying tips… and yes, you may need these tips to make it through this with your sanity intact.
Before we start, let it be known we are not trying to sway you in any particular direction but we only want to make sure you’re aware of a few items that could go overlooked. And the majority of the following advice can be applied to pretty much any purchase you’re making in the audio world.
[Find out what speakers are best for you. Take the quiz]
Price point
As with anything, it is important to start by setting a budget for yourself and finding a product that aligns with this budget.

There are a ton of great wireless products out there, some of them are practically being given away, and others might cost your life savings. No matter your budget, one fact remains: a quality wireless speaker setup doesn’t HAVE to be expensive. Conversely, you often get what you pay for, so it is wise to be wary of a product whose price tag looks more like a shoe size if you catch my drift.
Features
Another important point that will assuredly be different for everyone is the inclusion of features.
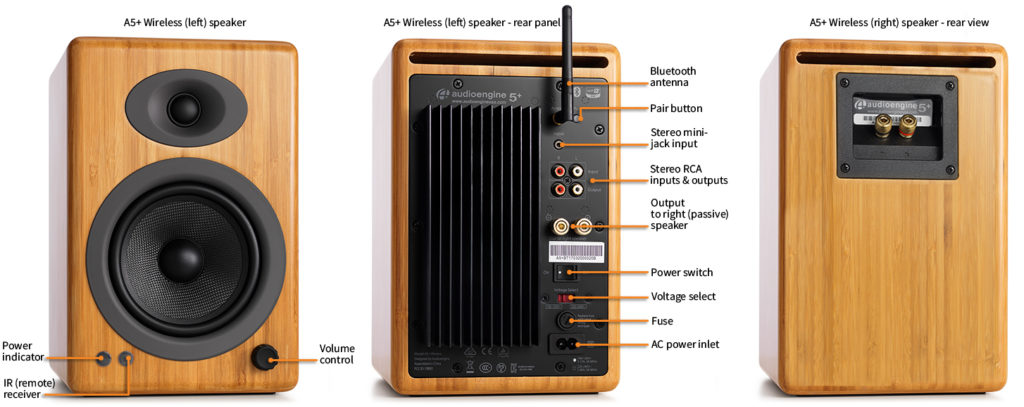
If you’re looking for a simple wireless speaker with no options and no extra inputs, then don’t bother spending hours comparing products that are saturated with bells and whistles. If, on the other hand, you know you want the option to connect an analog device like a stereo or surround sound receiver, for instance, make this determination early and stick with it. There will always be an option to suit your exact needs so don’t feel pressured.
Reviews
Reviews are king in today’s world.
Everything from the usability of a product to the competence of a company’s customer service team can be scrutinized in an online review, and that’s why it’s obviously important to read as many reviews as you can find (and to also read between the lines with some of these). A responsible company addresses negative reactions and does not let any concern go unnoticed. Reviews not only tell us how customers react to a product but how a company reacts to its customers. And the way a company reacts to its customers can tell you whether you’re making a good or bad purchase.
Warranties and trials
This is always a fun one! If you’re having trouble deciding between two or more products because they have the same features and similar reviews, why not go with the one that offers a trial or a better warranty?

The wireless audio market is extremely competitive, and most companies are offering a brief trial period with no penalties or full-coverage or even an extended warranty period. The fact is, a company with a truly great product has nothing to fear and is confident in their product’s ability to satisfy anyone and everyone.
Portability and durability
Where are you going to be using these speakers? Are you going to sling wireless audio from the kitchen to the living room, or are you taking this setup down to the park for a picnic? Do you need the speakers to be battery powered? Waterproof?
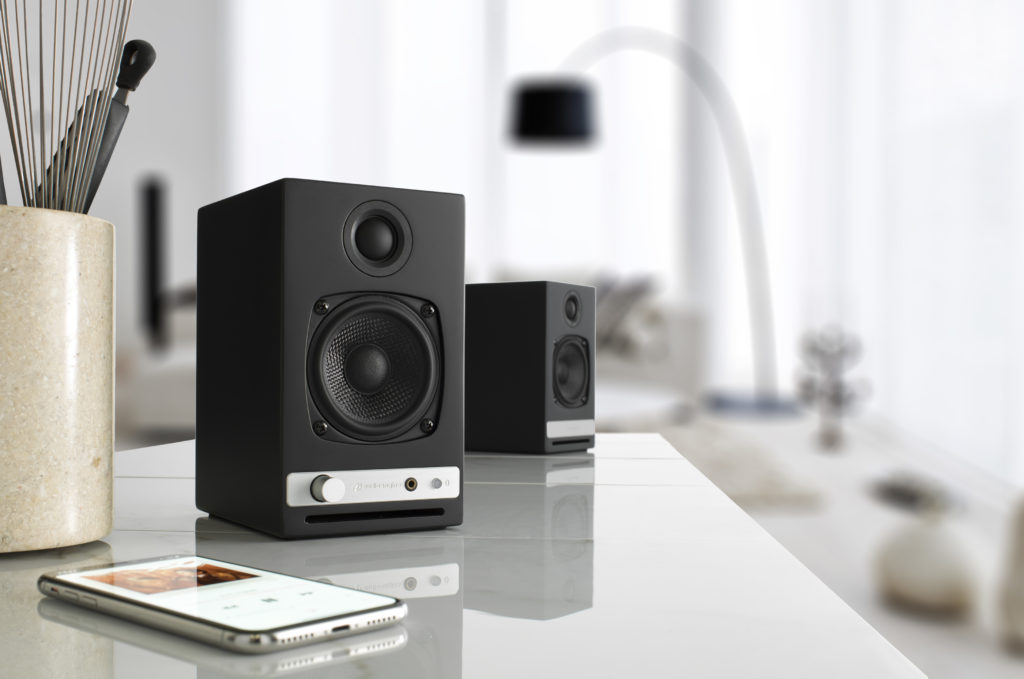
I know, I know, asking way too many questions but you should be asking these questions too! Again, there will always be a product that suits your needs for portability — and often times, if the speakers are easily portable, they will also be durable to some extent. The caveat is that certain other aspects of the speakers will inevitably suffer. Sound quality, aux inputs, wireless range, etc.; these are all things that have the potential to “get the boot” the more portable or waterproof your speakers need to be.
Sound quality and wireless range
Obviously we want our wireless speakers to sound great and to not drop out or lose signal EVER.
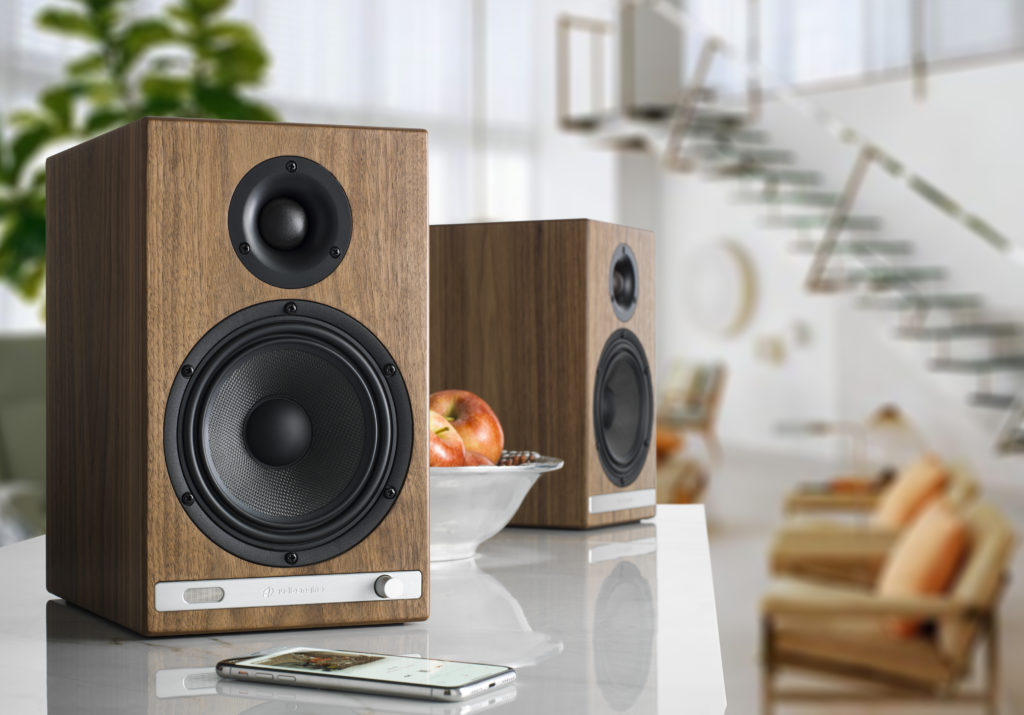
The sound quality of the actual speaker itself is something you may need to derive from customer reviews, unless you have the option to actually hear the speaker before making a purchase. Apart from that, it’s best to read up on the company, what materials they are using, and what the speakers can be compared to, etc.
But when it comes to the sound quality of the actual WIRELESS itself, you’ll need to look out for a few things. Wi-fi or Bluetooth and other fun terms all define different ways a speaker can receive wireless audio information and process it. Each of these has its own pros and cons, and some will be more or less suitable to your particular setup. Wi-fi is good if you want to transmit audio to multiple speakers at once but Bluetooth has a much easier setup and the ease-of-use is a HUGE advantage. But for the best sound quality AND ease-of-use, you will want to look for Bluetooth products that use the aptX or aptX HD “codecs”. These will give you the best audio quality possible, and with Audioengine, the longest range as well. If you wish to get into more technical details about this type of wireless audio, please read our article on Bluetooth aptX HD technology.
In summary, there are a myriad of products on the market and all have their pros and cons. To get started, make a list of things you want and need out of your music system. Determine what is necessary, nice-to-have, and what you don’t need. Then when you make the detrimental error of Googling, “Best Wireless Speakers,” you might make it through to the other side with your sanity intact.
Still struggling with choosing the right speaker? Take our quiz and make it easy!
Customer Inquiry: "I've recently upgraded to the Audioengine A2+ Home Music System and am thoroughly impressed by the sound quality. Is there a way to further enhance this setup for a richer audio experience?"
Why a Subwoofer is Important:
The Audioengine A2+ excels in high and mid-range frequency reproduction, providing an expansive soundstage. Its mid-woofers deliver a balanced bass, but for deeper, more resonant bass frequencies, adding a subwoofer will introduce you to an entirely new music experience, with bass reminiscent of your favorite live concert.
Expanding Your System with a Subwoofer Integrating a subwoofer into your Audioengine home music system can dramatically improve your audio landscape:
- Deepened Bass Response: A subwoofer like the Audioengine S8 is dedicated to reproducing the lowest frequency sounds, enhancing the depth and dimension of the audio, especially in tracks with significant low-end elements.
- Enhanced Balance and Clarity: The subwoofer takes on the lower frequencies, allowing your system to focus on delivering clear highs and detailed mids. This separation ensures a balanced sound output and maximizes the performance of each component within its frequency range.

Adding a subwoofer reveals the full spectrum of sound that the artist intended to be a part of your musical experience.
Subwoofer Types: Sealed vs. Ported and Their Placement
- Sealed Subwoofers for Jazz and Acoustic:
- These subwoofers, like the Audioengine S6, offer a tighter and more precise bass, perfect for the nuanced sounds in jazz and acoustic music. Due to their controlled bass response, they are versatile in terms of placement and can be positioned either on the desk or in any compact space within the room.

- Front-Firing Ported Subwoofers for Metal and Energetic Genres:
- These subwoofers are designed to handle the depth and intensity of genres like metal. They are ideally placed at listening height for the best experience. An elevated shelf or the desk itself can be great spots, ensuring the sound is directed straight at the listener for maximum impact.

Space Considerations: Choosing the Right Size and Placement
- U and L-Shaped Desks: These desk designs offer unique opportunities for subwoofer placement. With more corner space and legroom, you can consider slightly larger subwoofers that wouldn't traditionally fit under a standard desk.
- Proper Placement: A front-firing subwoofer should be placed in an elevated position, such as your desktop, while a down-firing subwoofer should be placed on the floor.
- Larger Subwoofers for Spacious Setups: If you have more room, especially with U and L-shaped desks, a larger subwoofer can be placed on the ground under the desk. Their down-firing design is particularly effective in this placement, as it allows the sound to resonate off the floor, filling the room without taking up valuable desk space.

Conclusion:
Selecting the right subwoofer for your desktop setup involves understanding your music preferences, considering your available desk space, and deciding on the appropriate size and type of subwoofer. Whether it's a compact sealed model for jazz and acoustic melodies or a larger ported subwoofer for the dynamic ranges of metal, the ideal choice will transform your listening experience into an experience rivaled only by live performances.
Why go wireless?
If you haven’t used them before, wireless speakers might sound like a hassle to set up, connect to, and maintain in your home. The truth is, getting your wireless speaker system started doesn’t take much and can easily be done in a matter of minutes.
With all of the mobile technology available at our fingertips, there’s no reason to be tied down to one method of listening to your music; whether it’s your phone, laptop or tablet, your streaming sources are unlimited when you go wireless.
One of the greatest benefits to adopting a wireless speaker system is getting rid all of those unsightly wires running along your floors and behind entertainment centers. This alone gives you plenty of options for placing your wireless speakers where they will work best for your listening experience. Not to mention that without all of the wires and confusing installation instructions, you’re free to connect them to your phone, computer or tablet via Bluetooth and start enjoying them right away.
It’s fairly simple to connect directly to Pandora, Spotify, or any other music streaming source you prefer as long as you follow instructions. Audioengine’s wireless speakers, for example, are designed so that once they’re turned on, you need only activate Bluetooth in your device’s settings menu and select the correct speaker to connect.
If you do run into trouble installing or connecting to your new speakers, our Audioengine support reps are ready to step in and show you the best possible solution for the issue.
[Find out what speakers are best for you. Take the quiz]
Our technology
At Audioengine, we provide only the best products. Currently, we have a few varieties of wireless home speakers, including the B2 wireless speaker, which boasts an easily adapted Bluetooth wireless system for your phone, and the HD6 wireless speaker with versatile power and connectivity features. We also are readily available to answer any of your questions, so you not only get the awesome sounding audio you want, but also the tools to make it fit right into your home.
With many modern audio speakers and systems adding wireless functionality to their list of features, you may wonder whether you are doing yourself a disservice by going wireless and ask yourself “is wireless audio quality any good?”
Believe it or not, wireless can sound just as good as a wired connection, meaning you won’t have to sacrifice quality for convenience.
Our wireless speakers utilize Bluetooth technology which definitely has its advantages; it’s fairly universal and, with its lack of proprietary software, is really easy to set up. There must be a catch, right? In the past, we felt that Bluetooth technology wasn’t up to snuff, both in terms of the range of the signal and the quality of audio. In recent years, however, Bluetooth technology has seriously done a lot of growing up; advances in the technology has increased the bandwidth and range, making it not only function great, but sound great. Bluetooth now has the capability of streaming up to CD quality, or 16-bit/44.1kHz, over the air, which means that right out of gate you’re able to send great sending audio without being tethered by cables.
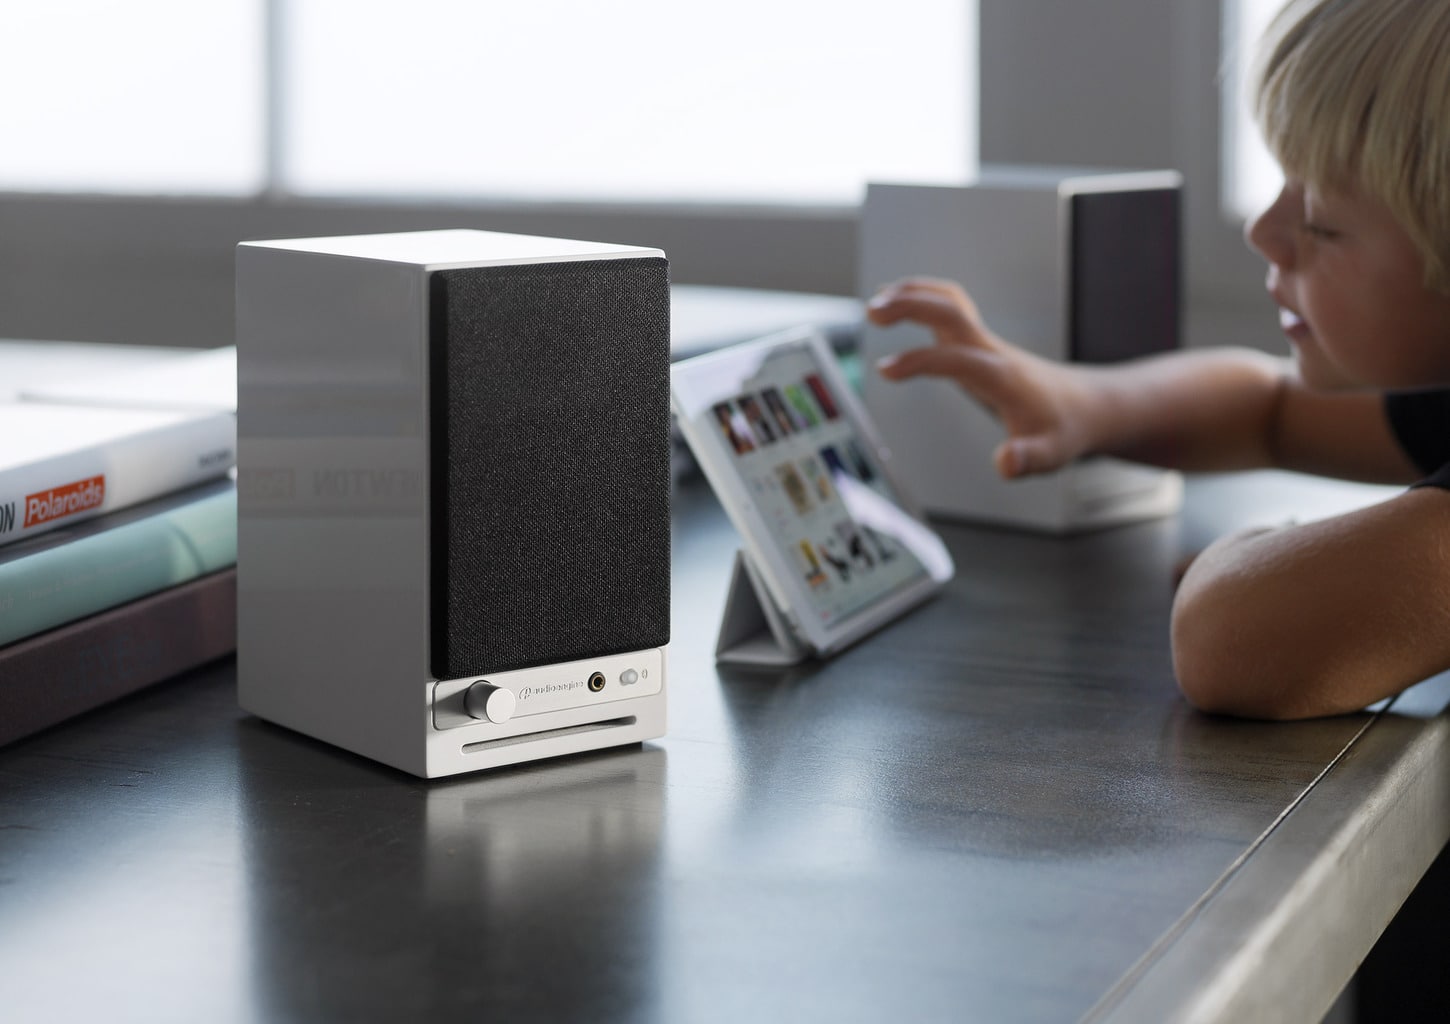
Codecs play a part in how Bluetooth audio is sent and received and some codecs provide slightly better fidelity than others.
In products like our B1 Bluetooth Music Receiver, we utilize the aptX HD codec, which we feel provides you with the highest fidelity decoding possible. Some devices, like most iOS devices, don’t utilize aptX, but even though we use aptX in our products, other great codecs like SBC and AAC will work and sound great. Not to mention, we utilize built-in DACs in our Bluetooth products, which will take your audio and pad the bit-depth to a 24-bit format, giving you added benefits such a lower noise floor.
Even though we use Bluetooth in more of our newer products, we do have other wireless options if you’re looking for any non-Bluetooth solutions. We offer two different wireless audio adapters, the W3 Wireless Audio Adapter the D2 Wireless DAC. The wireless technology used in both of these products is a lot like Wi-Fi, but on a closed protocol built specifically for high-resolution audio. The W3 includes a 16-bit/44.1kHz DAC, which makes it able to send CD-quality uncompressed audio over the air. If you’re looking for high-quality, though, the D2 represents the absolute highest possible performance wireless audio device we could build, able to send 24-bit/96kHz wirelessly.
So is wireless audio quality any good? The short answer is yes!
Using only the best hardware and software, you can rest assured that the wireless gear you’ve been considering will not only add convenience to your listening experience, but will retain the authenticity that you expect from your music.
Bluetooth Audio and Codecs
If you’re curious about wireless audio and have found yourself doing some research, you’re probably awash in buzzwords like codecs, sample rates, bit rates, resolution, bandwidth and heaven knows what else.

Lest you throw up your hands at the complexity of it all let’s do our best to explain some of the basics of Bluetooth audio.
Bluetooth is a radio signal that sends data from a transmitter in your phone or computer, to a receiver in your headphones or speakers. In order to be sent from one device to another in an efficient manner, this data has to be encoded by the transmitter and then decoded by the receiver on the other end.
This is a big job, not to mention it all has to be done in a fraction of a second.

The problem here is that traditional Bluetooth codecs can’t process the amount of information necessary to recreate a faithful audio signal on the other end, so they have to compress the information. During compression, little bits of information are lost, and as we discussed earlier, the “information” in this case is YOUR MUSIC!
Think about that for a second!
Your devices can’t keep up with the amount of information your music requires, so they essentially throw it out; little bits of the frequency spectrum, dynamic range, etc. This may not sound like a big deal, but when you consider the idea that something like aptX HD can fix it, why would you settle for anything less?
Now before we dive into some of the technical aspects of what makes aptX HD so amazing, it’s important to discuss some of the older codecs so we can understand what aptX HD really brings to the table.
Think of the word “codec” as a combination of the terms “code” and “decode,” as these are the primary functions of all audio codecs; their job is to encode large information files so they can be more easily transferred, and then to decode that same file on the other end.

You’re familiar with MP3s, right? Well, an MP3 is just a type of codec… a very widely used type of codec, in fact. Since we have all used MP3s, we are probably all familiar with how dramatically they can degrade the quality of an audio file. Luckily, tons of codecs have been developed over the years, all with the goal of vastly surpassing the audio quality of a standard MP3. Some other codecs you may be familiar with are SBC, AAC, LDAC, and aptX. These are all considered superior to MP3s, but are also geared towards Bluetooth wireless audio.
So what’s the difference between standard aptX, and aptX HD?
For starters, aptX has actually been around since the 80s, and is currently much more widely used than aptx HD. Standard aptX has been used in phones, tablets, and laptops for a long time now so it’s likely that you’ve actually experienced Bluetooth transmission that features aptX. But for those of you who are looking for some numbers, here you go:
Standard aptX:
- Speed: 352 kbps
- Sample Resolution: 16-bit
- Sample Rate: 48kHz
Aptx HD:
- Speed:576 kbps
- Sample Resolution: 24-bit
- Sample Rate: 48kHz
Alright, let's talk about that for a second.
The speed of these file transfers are measured in Kilobits-per-second (Kbps), and they define how quickly all of this audio information moves from one device to another. 48kHz denotes the sample rate of the audio data — the sample rate is measurement of how many samples of audio are carried from one end to the other end per second.
So this means aptX HD is providing audio information 48,000 times per second… and that’s a lot of times.
Next, 24-bit denotes the sampling resolution — sample resolution is a measurement of how many bits of information are included in each sample. Most Bluetooth codecs simply cannot provide this much information. Even if they could, they wouldn’t be able to encode it and decode it faithfully within 1 millisecond.
Long story short: aptX HD recreates your audio data more accurately and in greater detail than aptX and does this more quickly, efficiently, and with very low latency. Pretty impressive right?
Now I know Bluetooth audio has been pretty crappy in the past, but those days are over. Out with the old, in with the new! With Apple and Google doing away with headphone jacks on their phones, we are practically being forced to make the switch to Bluetooth — this is why aptX HD makes so much sense. If we are going to be forced to go wireless, why don’t we take advantage of some Bluetooth sound quality that surpasses even traditional wired headphone connections in some cases?
Which devices support aptX HD?
In order to take advantage of the benefits of aptX HD, you’ll need to make sure you have a device that supports it.
These devices will have a Bluetooth chip called the CSR8675, which is capable of supporting 24-bit audio from aptX HD.
Bluetooth Receiver vs. Wireless Speakers
Customers occasionally write to ask questions about the differences between our B1 Bluetooth Music Receiver and our Wireless Powered Speakers. Usually the questions go something like…
“Do I really NEED your complete speaker system or just the B1 receiver?”
“Is one product easier to use than the other?”
“Are there differences in sound quality between the B1 Bluetooth Music Receiver and your Audioengine Wireless Speakers?”
…and there have been plenty more questions that come along with those — but have no fear, today we are here to hopefully clear this up!
First off, you should have some peace of mind knowing that no matter which solution you choose, we absolutely guarantee your satisfaction. Apart from that you might be wondering which option is going to best suit your needs — reasonable enough, so let’s talk about it…
Do I really NEED the entire system or can I get away with just the B1?
Audioengine wireless speakers are powered music systems that implement cutting edge Bluetooth aptX-HD to deliver high-fidelity long-range wireless from any device.
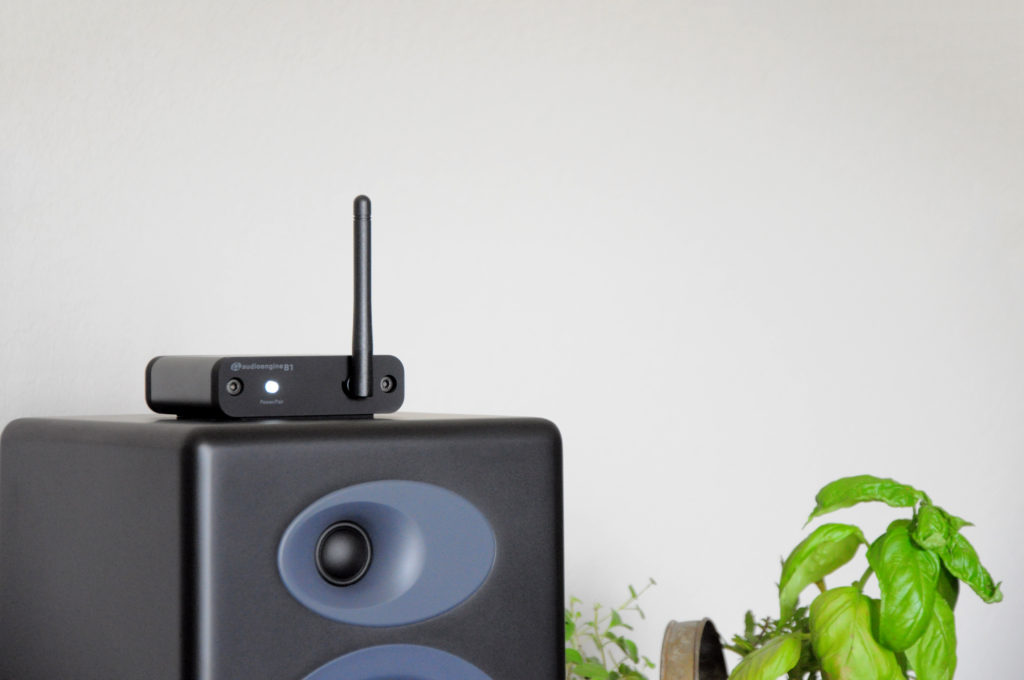
The B1 Bluetooth Receiver also offers the same aptX-HD technology; the only difference being that B1 does not have built-in speakers, so you will still need speakers to hear your music.
Now, customers sometimes say “I already have a different brand of powered speakers that I LOVE, I just want to make them wireless.” If this is the case, you can use B1 to turn your current non-wireless music system into some super-rockin’ wireless speakers. Or maybe you have an older pair of Audioengine speakers that you bought before we made our speakers wireless — here again, the B1 is a great solution! You just need to make sure, no matter what system you have, that you have the proper inputs — RCA-style inputs work the best, or even an optical audio input if your gear has one.
Is one solution more user-friendly than the other?
Hey, great question — glad you asked! This one is a bit subjective and depends on how many components you want in your setup.
The simple fact is if you have Audioengine wireless speakers you will have the easiest setup under the sun. All you have to do is connect your speakers to power, connect the left speaker to the right, find the speakers in your phone or tablet’s list of available Bluetooth devices and BOOM, you’re done! Think of it as if the B1 Bluetooth receiver is built into Audioengine speakers.
On the other hand, if you are using a pair of non-wireless speakers and you want to make them Bluetooth compatible by using our B1 Receiver, you will need to add B1 to your setup, but in all actuality the B1 itself is just as easy to use as the speakers. Long story long, if you love your current speakers and aren’t ready to make the switch, adding the B1 is still an extremely user-friendly option and you will be up and running with great-sounding wireless audio in no time flat.
Are there differences in sound quality between the B1 and the Wireless Speakers?
This is the only moment in this article where things might teeter on the brink of being controversial.
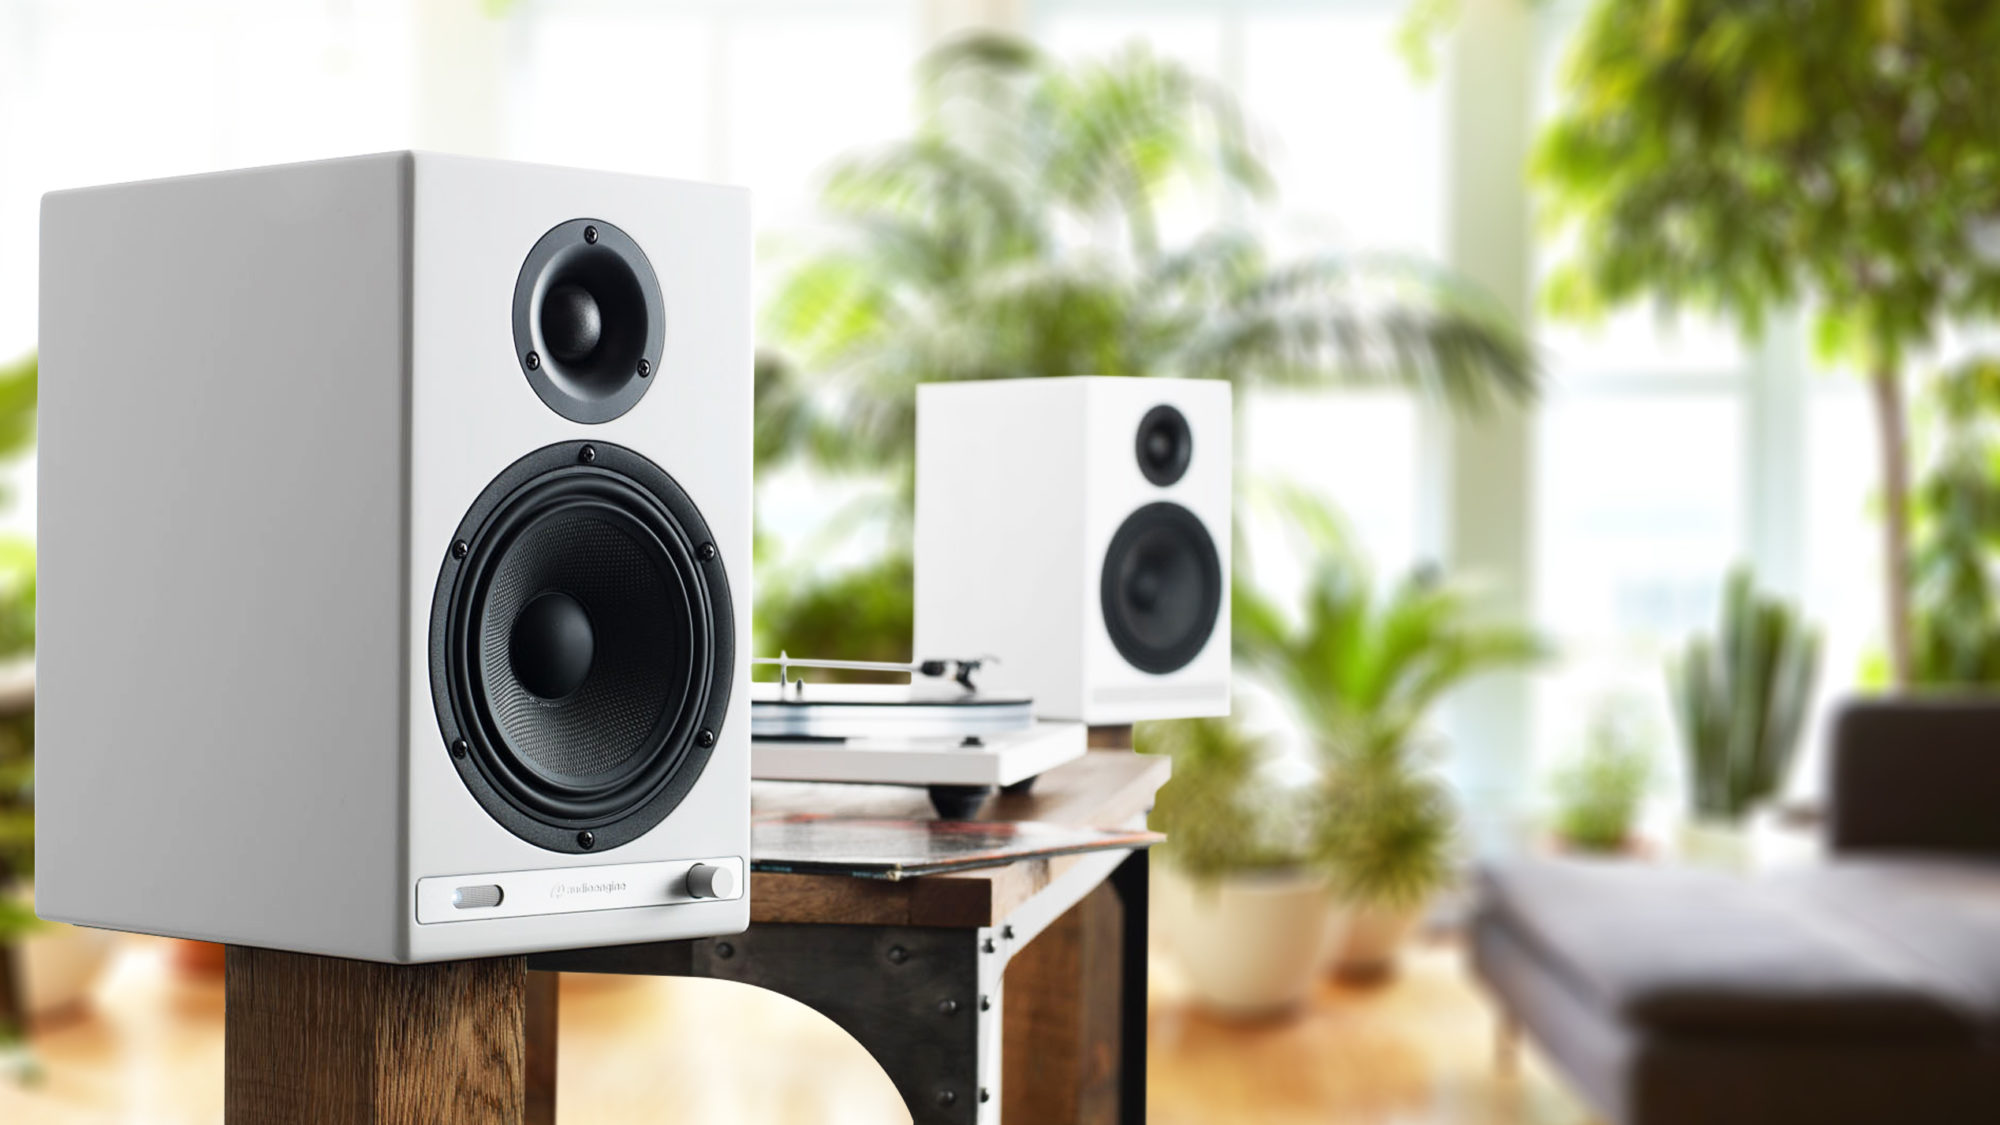
Audioengine’s Wireless speakers guarantee immaculate and highly satisfying sound quality, which is hard to beat. The B1 offers aptX-HD Bluetooth with 24-bit upsampling (which are the exact same Bluetooth specs as our wireless speakers), so the audio being SENT from your devices to the B1 is no different than the audio being SENT from your device to Audioengine’s Wireless Speakers; however, the B1 itself doesn’t have any speakers, so it has to rely on whatever speakers it is connected to. This is the only point at which your sound quality COULD suffer.

So let’s say you are sending the highest quality audio file from your laptop to the B1 Bluetooth Receiver. The B1 takes that super-high-quality file and handles it with such great care you may not be able to tell whether it was wireless or not…BUT, if you have your B1 connected to a crappy pair of speakers, guess what? No matter how pristine that audio file was, and no matter how skillfully the B1 handles that file, crappy speakers are going to make that audio sound crappy. BUT, if you are using the B1 to send audio to a pair of really great speakers that you love, the B1 will absolutely deliver the highest quality audio possible via Bluetooth, and it will do so with an extended range so you can bounce around the house and not worry about dropouts or inferior audio quality.
This was a ton of information so here’s a quick recap and summary…
The Bluetooth capability of Audioengine’s Wireless Speakers and the B1 is exactly the same. If you love your current speakers and aren’t ready to change brands, don’t sweat it, the B1 will give you beautiful wireless audio all the same. BUT, if you are looking to be truly reinvigorated by your music, you definitely need to try Audioengine’s Wireless speakers to take advantage of both our highly advanced Bluetooth technology and our unparalleled listening experience.
Why We Choose Bluetooth over WiFi
It’s no secret that most players in the “smart” speaker market are primarily using wi-fi to wirelessly send audio around the house.
So if Sonos, Bose, and other big name brands are using wi-fi through an internet router, why would Audioengine use Bluetooth for wireless audio in their home speakers?
Easy Setup
Audioengine wireless home speakers are ready to use within minutes out of the box.

Connecting power and the speakers to one another is easy enough, but getting your music playing wirelessly is actually even more straight-forward. Unlike most of the big brand smart speakers, you don’t need to download and install apps for setup, you don’t need to connect the speakers to your router, and there aren’t any passwords or other overly-complicated hoops to jump through. Audioengine makes it simple by keeping the wireless connection exclusively between your phone, tablet, or computer and the speakers. Simply go to your device’s list of available Bluetooth connections, select Audioengine, and play music directly from your favorite app! Spotify, Pandora, Tidal, iTunes, YouTube; any apps that stream audio from your device can be played through your Audioengine home speakers. And remember, our speakers don’t depend on the speed of your internet connection or wireless router so when your internet slows down or doesn’t cover all of your house, you can still stream from your phone or connect another device via one of Audioengine’s many audio ports, which brings me to the next point…
Flexible and versatile
Even before the implementation of our long-range wireless Bluetooth audio, Audioengine home speakers have been some of the most versatile on the market.
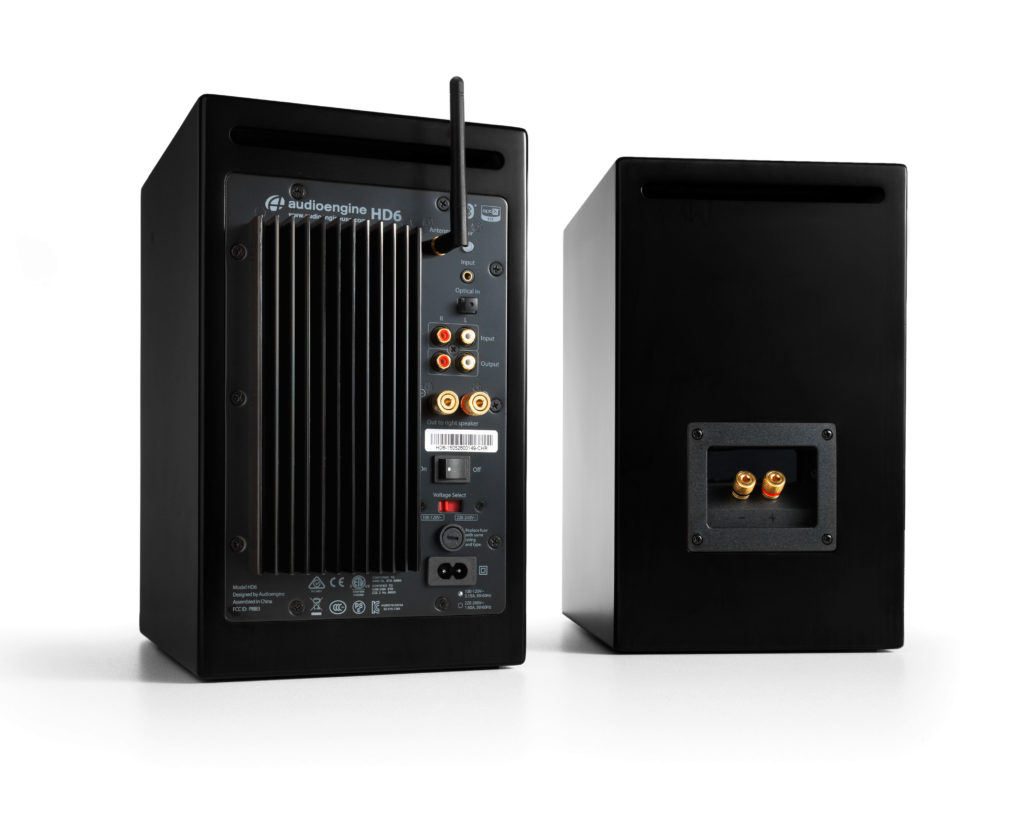
A selection of inputs allow you to not only stream wirelessly but to easily and quickly connect your turntable, TV, AVR, or any other piece of gear with an audio output. The point being, is that you are not bound to a single input source. Not many auxiliary options are offered among the rest of the smart speaker community, leaving the user completely reliant upon the wi-fi connection and other compatible devices they may already own. And what about when you’re using Alexa to search for music, but a particular song can’t be played due to copyright issues? This can happen with voice-controlled systems, but we all know a quick visit to YouTube can typically get around this barrier and play the music you want to hear. Now you can actually listen to any Beatles tune you want, whenever you want, but at the same time you can also connect to an external Alexa device for superior sound with Audioengine.
Range and quality
Bluetooth transmission range was not so great in the past, as many of you have experienced. And products using wi-fi still tout the superiority of its range over that of Bluetooth, but the truth is, those days are over.
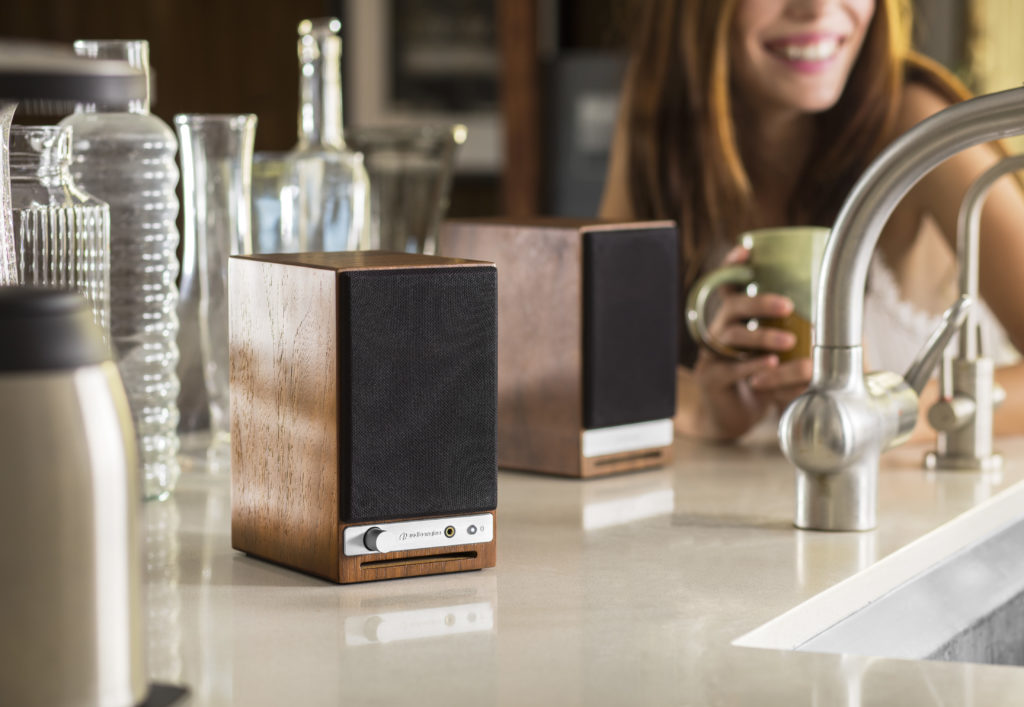
Audioengine home speakers utilize cutting-edge tech that allows a solid transmission of up to 100 feet (and sometimes more) with no drop-outs and no blips. Again, this range is not reliant upon the ebb and flow of your wi-fi strength at any given point. But what about sound quality; isn’t Bluetooth kind of crappy? No way! Bluetooth audio has come a long way in the past few years as well, and the implementation of the aptX HD codec allows for near lossless audio transmission that rivals the sound of many wired music systems.
Elegant aesthetic and sound
Audioengine home speakers have always held sleek looks that equals their sound quality, and with the shift to high-quality wireless, these standards have been upheld.
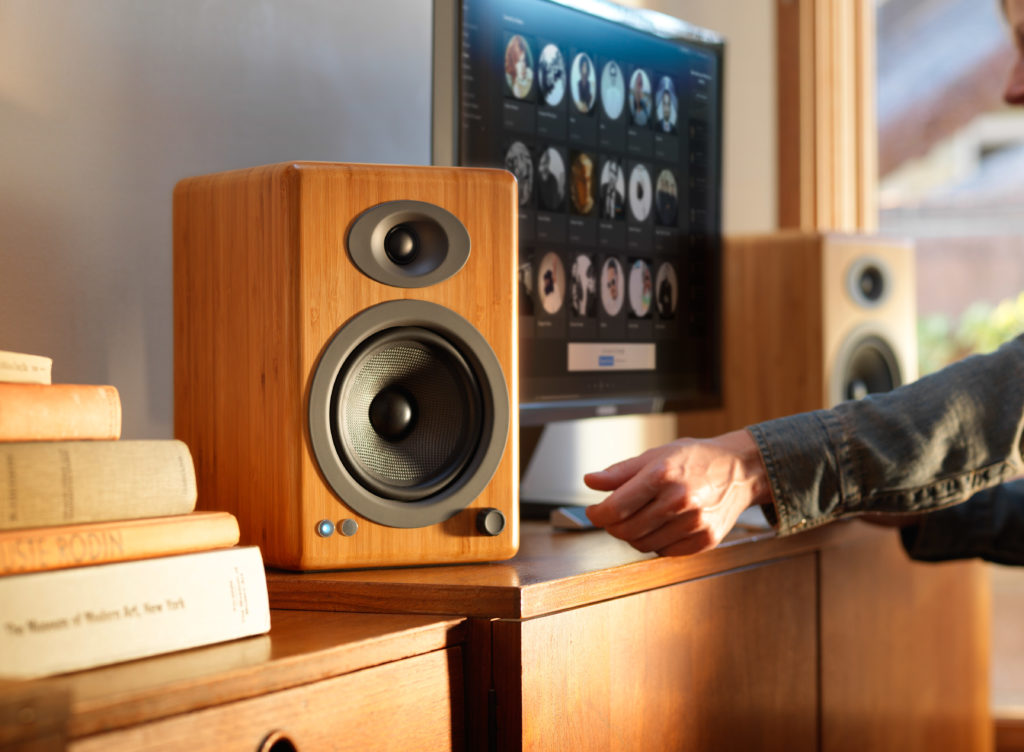
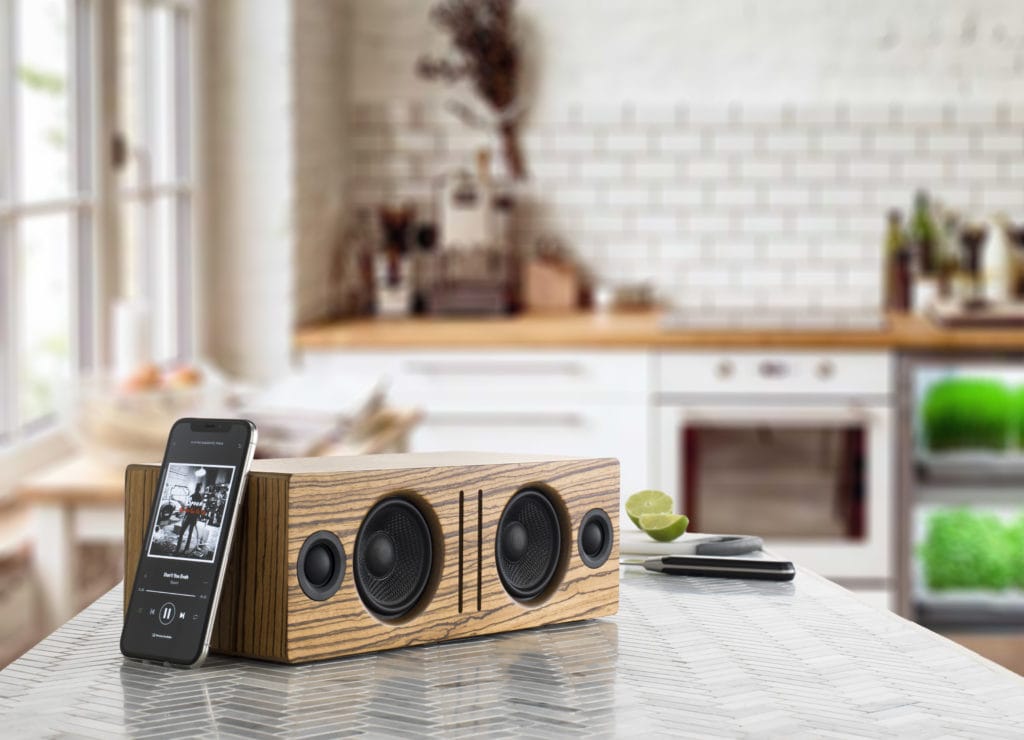
We didn’t want to sacrifice our warm, rich, analog power amps and hand-built wooden cabinets by trying to cram all that goodness into a generic-looking plastic speaker enclosure with average-quality wireless. We want our speakers to be an integral part of the look and feel of your home and we also want you to have TWO speakers so your listening experience can be what it’s meant to be. Other systems allow you to purchase “add-on” speakers, but that means in order to have two speakers you have to, well… spend more money for “add-on” speakers. Audioengine home speakers come standard as a stereo pair that are tuned to perfection. To put it simply, Audioengine home speakers are some of the best-sounding speakers on the market today. “Smart” speakers tend to put more focus on the “smart” portion than on the “speakers” portion, often leaving the sound reproduction underwhelming. Would you rather watch the next season of GOT on a single wi-fi speaker or on a matched pair of award-winning audiophile-grade speakers with true stereo sound?
So, it’s safe to say Bluetooth and wi-fi each have their own advantages, just as anything else. But in the end, Bluetooth was the choice we made to be as user-friendly, versatile, and as hi-fi-sounding as possible.
How to Stream Music from my Phone to my Stereo?
We want things to work, is that so much to ask?
There is such a mass of technology and gadgetry available out there today that, for the most part, the good stuff sticks around and the bad stuff is pushed right out the door, never to be seen again. But when it comes to streaming music from our phones to our stereo systems, we sometimes still have to jump through hoops to get our gadgets to see eye to eye.
Rest easy, friends, for today I am here to make it very very easy. Let’s talk about a couple of ways Audioengine can get your music streaming from phone to stereo in less than 1 minute!

Using Audioengine Wireless Speakers
If you are one of the TRILLIONS of highly intelligent individuals who have already purchased a set of Audioengine wireless speakers (this includes the HD6, HD3, A5+ Wireless, and B2 speakers), you are in luck, as this is the easiest possible way to get your music streaming.
To get the system up and running in general, all you have to do is take your speakers out of the box, plug the left speaker into power, connect the left speaker to the right speaker via the included speaker wire (does not apply to B2, it's just one little speaker), and flip the power switch to the ‘On’ position. After the speakers are on, the only thing left to do is find the speakers on your phone’s list of available Bluetooth devices, and select them. They will pair within seconds after just ONE click! You’re done -- can you believe that!? Sheesh, that was easy. But what if you don’t have a pair of Audioengine wireless speakers?
Using Anything Else
Okay so maybe you don’t have a pair of super awesome wireless speakers, that’s cool, Audioengine can fix that in less than a minute using our B1 Bluetooth Receiver.
The same principals will apply from the previous section, but first, we have to MAKE our non-wireless speakers into wireless speakers. Let’s unpack our B1 Bluetooth receiver, connect it to power, and then run cables from the analog OUTPUTS on our B1, to the analog INPUTS on our existing speakers. Boom -- now our speakers are wireless, crazy right? The final step is the same as before; just locate B1 in your phone’s list of available Bluetooth devices and click. You’ll be paired in seconds and ready to rock that Duran Duran Greatest Hits album you just downloaded.
Keep in mind, once you’re paired like this, you should be able to stream any and all audio from your phone to your speakers. This means, iTunes, Spotify, Tidal, Pandora, everything. Everything!
No more banging your head against the wall trying to get things paired up, no more proprietary passwords, and no more having to reconnect every ten minutes. It really is the best way to stream music from your phone to your speakers, no matter what kind of speakers you are using.
Now, why don’t you stream your way on back to our Wireless Speakers and see what you’re missing out on!
Speaker Setup – How to break in new speakers.
So you just got your brand new Audioengine speakers and you’re ready to pull them out of the box and get them set up so you can start rocking out.
Straight out of the box, your speakers should sound great, but what if your speaker setup could sound better with time?
One thing that you can easily do to make that new speaker setup sound top-notch is a thing called “break-in” and it’s actually really simple.
So why would you want to break the speakers in?
The materials we use for our speakers are quite robust, so right after manufacturing they can be a bit stiff.
One way to help out with this stiffness is to break them in so that these materials, such as the rubber surrounds of the aramid fiber drivers, loosen up. As mentioned earlier, the speakers should sound great from your first listen, but after they move around a bit and loosen up you should notice smoother low end response and sweeter mids/highs.
From time to time, we get asked about how to break in new speakers.
The break-in period doesn’t really require anything special other than listening to music and over time your speakers will become more and more broken in.
For proper break in, we generally recommend around 40 to 50 hours of at least mid-level playback before doing any critical listening. Some our customers have mentioned that they play tones or white noise while they are away, such as while they’re at work, to help the process along, but we’d recommend just listening to them normally at a medium-level during the break in period.
Breaking in your new speaker setup is a simple and crucial thing to do to make your speakers sound better and open up their potential. Some things do get better with age!
Audioengine – Doesn’t Your Music Deserve It?
Audioengine’s Home Music Systems are designed to deliver exceptional sound quality, offering you a next level gaming experience enhancing every footstep and gunshot, pulling you into the game's world, making every moment feel real and alive.
This guide will help you navigate the nuances of connecting your Xbox Series X or PS5 directly to your Audioengine Desktop Speakers, Gaming DAC, or other speakers. Before we dive in, let's address a crucial but often overlooked aspect: the type of display you're using.
Why TVs Simplify Speaker Connection
Gaming on a modern TV makes connecting speakers straightforward. TVs usually offer a variety of audio outputs, giving you several options for your audio setup. Simply connect via HDMI to your TV and connect the speakers through an available audio output.
Computer monitors, while often providing high refresh rates, often have limited audio output options and so, this guide will be helpful to those of you who are looking to avoid using a TV.
Note on Direct Connections
The FAQs and compatibility table below focus on direct connections between your gaming console and speakers. If you're using an additional device like an A/V receiver, or connecting through your TV, compatibility may differ.

Audioengine's Best Selling A2+ Desktop Speakers
How To Connect Your Xbox Series X to Your Speakers
Can I connect external speakers to my Xbox Series X?
Certainly, although with limitations. The Xbox Series X doesn't natively support USB, optical, or Bluetooth audio outputs. You can, however, utilize the 3.5mm audio jack on the wireless controller to connect speakers that accept this input.
We recommend purchasing an inline HDMI audio extractor. This device can take the HDMI output from your Xbox Series X and extract the audio to outputs like Optical or RCA, allowing you to connect your speakers more easily.

How To Connect Your PS5 to Your Speakers
Can I connect external speakers to my PS5?
Yes, you can. The PS5 supports USB audio output, making it compatible with speakers that offer this input*. However, the PS5 does not support 3.5mm, optical, or Bluetooth audio outputs.
Why is the type of display I use important?
As previously mentioned, your choice of display—whether a monitor or a TV—affects your audio options. Monitors usually lack the audio output variety found in modern TVs.
Summary of Input Compatibility
Refer to this table for compatibility between different audio input types and the Xbox Series X and PS5:
| Input Type | Xbox Series X | PS5 |
| 3.5mm | ✓ (via controller) | ✕ |
| USB | ✕ | ✓* |
| RCA | ✕ | ✕ |
| Optical | ✕ | ✕ |
| Bluetooth | ✕ | ✕ |
Key
- ✓: Compatible
- ✕: Not Compatible
- Note: *While the PS5 supports USB audio, it supports USB Audio Class 1 devices. If your device doesn't support USB 1.0, you will need an adapter as discussed in this guide on the PS5 reddit. We have confirmed that the Audioengine A2+ (current generation) will support USB audio from the PS5.
Final Thoughts
Understanding your setup's compatibility is essential for an optimal audio experience. Using a TV provides more options for connecting your speakers, but a monitor isn't entirely limiting; you just need the right equipment, like an HDMI audio extractor for Xbox setups.
Feel free to explore our other resources to further optimize your gaming and audio experience.
How to Connect Your Studio Monitors to Your TV
Connecting studio monitors to your TV can enhance your viewing experience with high-quality sound. Studio monitors are designed for precise audio reproduction, making them a popular choice for audio professionals. However, there are several considerations and potential drawbacks to using studio monitors for TV audio. Here’s a step-by-step guide on how to connect your studio monitors to your TV, along with some important notes.
Step 1: Determine Your TV’s Audio Outputs
Identify the Available Outputs: Most modern TVs come equipped with various audio output options, including HDMI ARC, optical, RCA, and 3.5mm headphone jacks. Check your TV's manual or inspect the back panel to identify the available outputs.
Note: While studio monitors can be connected via these outputs, they may not offer the same listening experience, convenience and versatility as powered speakers designed specifically for home audio use, like an Audioengine Home Music System.
Step 2: Choose the Appropriate Cables and Adapters
HDMI ARC: If your studio monitors have an HDMI input, you can connect them directly using an HDMI cable. This option supports high-quality audio but is uncommon for studio monitors.
Optical (TOSLINK): Use an optical cable to connect the TV's optical output to a digital-to-analog converter. Then, connect the converter to your studio monitors using balanced XLR or TRS cables.
RCA or 3.5mm: If your TV has RCA or 3.5mm outputs, use the appropriate cables to connect directly to your studio monitors. You may need an adapter if your monitors use balanced inputs.
Note: Using low quality converters and adapters can degrade audio quality and add complexity to your setup. Audioengine Home Music Systems offer direct connectivity options, making the setup process simpler and more reliable.
Audioengine HD6 Home Music System
Step 3: Set Up and Calibrate Your Studio Monitors
Placement: Place your studio monitors at ear level and angled towards your listening position. Ensure they are symmetrically placed for optimal stereo imaging.
Calibration: Adjust the volume and any built-in EQ settings on your studio monitors to match your listening environment. Some monitors have rear-panel controls for fine-tuning.
Note: Studio monitors are designed for near-field listening and may not provide the same immersive experience in a typical living room setup. Home Music Systems from Audioengine are optimized for both near-field and far-field listening, offering more flexibility and better sound coverage.
Step 4: Connect a Subwoofer
Subwoofer Output: If your studio monitors have a subwoofer output, connect an active subwoofer to enhance bass response. This setup is ideal for a more cinematic experience.
Note: Many studio monitors lack dedicated subwoofer outputs, limiting your ability to achieve full-range sound. Audioengine Home Music Systems typically include subwoofer outputs, allowing you to easily integrate a subwoofer for deeper bass.

Step 5: Adjust TV Audio Settings
Audio Output Settings: Access your TV's audio settings menu and select the appropriate audio output (HDMI, optical, RCA, or 3.5mm). Disable the TV's internal speakers if necessary.
Volume Control: Adjust the TV volume to a comfortable level. If using an external DAC or converter, ensure it is set to a neutral level.
Conclusion
Connecting studio monitors to your TV can significantly improve your audio experience, offering precise and clear sound. However, it's important to consider the potential limitations and complexities involved. Using various adapters and converters can affect audio quality and make the setup process cumbersome.
Note: While studio monitors are excellent for professional audio work, they may not be the best choice for home entertainment. Audioengine Home Music Systems provide a more user-friendly and versatile solution, with features like analog amplifiers, built-in DACs, and subwoofer outputs, ensuring superior sound quality and ease of use.
By following these steps and considering the alternative options, you can enhance your TV audio setup to better suit your preferences and needs.
0.7" (18 mm) thick MDF cabinets with real wood veneer
1" (26 mm) silk dome tweeters with neodymium magnets
5.5" (140 mm) aramid fiber woofers with advanced voice coils
Operating temperature: 32 degrees F to 95 degrees F
Non-operating temperature: -4 degrees F to 113 degrees F
Relative humidity: 5% to 95% non-condensing
Dimensions (HWD)
Left speaker (active)
Dimensions: 11.75" (30 cm) x 7.25" (18.5 cm) x 10" (25 cm)
Right speaker (passive)
Dimensions: 11.75" (30 cm) x 7.25" (18.5 cm) x 10" (25 cm)
Weight
Left (active) - 17.5 lb (8 kg)
Right (passive) - 12.5 lb (5.5 kg)
Total Shipping Weight
33.5 lb (15 kg)
Shipping Box Dimensions (LWH)
20" (51 cm) x 15" (38 cm) x 17" (43 cm)
Internal D/A converter
AKM AK4396
Input Bit Depth
up to 24 bit native
Sample Rate
up to 192 kHz native
Connector Type
N/A
USB Device Class
N/A
Input Bit Depth
N/A
Input Sample Rate
N/A
Internal D/A Converter
AKM AK4396
Internal BT Receiver
N/A
Input Bit Depth
24 bit (padded)
Bluetooth Receiver Type
Bluetooth 5.0
Supported Codecs
aptX HD, aptX, AAC, SBC
Supported Bluetooth Profiles
N/A
Wireless Operation Range
Up to 100 ft (30 m) typical
Input Data Rate
Determined by Bluetooth
Wireless Latency
~30 milliseconds (ms)
Type
Powered Bluetooth aptX HD speaker system
Amplifier Type
Class AB
Rated Power Output:
50W RMS per channel (measured in compliance with 16 C.F.R. § 432.3)
Peak Power Output: 75W per channel (AES)
Total Peak Power Output: 150W (AES)
Drivers
5.5" aramid fiber woofers
1" silk dome tweeters
Inputs
3.5 mm stereo mini-jack, RCA L/R, digital optical (SPDIF,) Bluetooth aptX
Outputs
RCA variable line-out
Input Voltages
115/240 V, 50/60 Hz manually switchable
SNR
>95 dB (typical A-weighted)
THD+N
Less than 0.05% at all power settings
Crosstalk
<50 dB
Frequency Response
50 Hz-22 kHz ±1.5 dB
Frequency Response w/ Bass Reduction Switch selected
N/A
Analog Input Impedance
48K ohms unbalanced (mini-jack and RCA inputs)
Nominal Impedance
N/A
Input Impedance
N/A
Crossover Frequency
N/A
Protection
Output current limiting, thermal over-temperature, power on/off transient protection, replaceable external main fuse
Power Consumption
Idle: 10 W
Mute: 6 W
Sleep: 4 W
Standby Consumption
N/A
Phase
N/A
Recommended Amplifier Power
N/A
Battery Life
N/A
Battery Charge Time
N/A
1. Turn Off and Unplug:
- Make sure your system is turned off and unplugged.
2. Dust the Surfaces:
- Use a soft, dry cloth to wipe away dust.
- For hard-to-reach places, use a soft brush or a can of compressed air.
3. Wipe Down the Exterior:
- We do not recommend using any solvents
- If cleaning off stains or build-up is necessary, we recommend doing so with a very small amount of mild cleaning solution applied only to the affected area, followed by quickly wiping the area dry completely.
- Any scoured pads or objects like a 'magic eraser' too easily run the risk of removing sealers and top coats of the painted finish that can leave a clearly visible change in the uniformity of the paint/finish
4. Clean the Speaker Grills:
- The speaker grills can be gently cleaned with a vacuum, preferably using a soft bush attachment.
- A lint roller can also be used.
5. Clean Buttons and Knobs:
- A dry cloth is recommend for cleaning any knobs, buttons or other surfaces
- Be careful not to let water get into any gaps.
6. Clean Ports and Connections:
- Use compressed air to blow out dust from ports and connections.
7. Let Everything Dry:
- Make sure everything is completely dry before plugging back in and turning on.
8. Regular Cleaning:
- Dust your system regularly to keep it in good shape.
By following these steps, you can keep your Audioengine system clean and working well.
Audioengine operates two websites, audioengine.com and audioengineeu.com. If you go to any other site but these, they are not an Audioengine site. For Canada, Mexico and most of Europe and the UK, we only sell through Amazon. There are also a host of authorized retailers and sites across the US, and they can be found here. For international sales, we have distributors that operate independently, and they can be found here.
What happens if I buy from an authorized site claiming to be Audioengine? Unfortunately, there is not much we can do. We are taking all the action we can to make sure those sites don't get indexed, but we recommend you work with the provider of the card you used to make payment to get your money back.
The Audioengine remote takes a CR2025 battery.
Step-by-Step Guide
- Open Terminal:
- You can find Terminal in your Applications folder under Utilities, or you can use Spotlight by pressing Cmd + Space and typing "Terminal".
- Execute the Command:
- In the Terminal window, type the following command and press Enter:
bash
Copy code
sudo pkill bluetoothd
- Enter Your Password:
- After pressing Enter, you will be prompted to enter your password. Type your Mac's administrator password and press Enter.
- Note that when you type your password, it won't be displayed on the screen (not even as asterisks). Just type it and press Enter.
By following these steps, you should be able to reset your Bluetooth service on your Mac, which can help resolve connectivity issues with your Audioengine devices or any other Bluetooth peripherals.
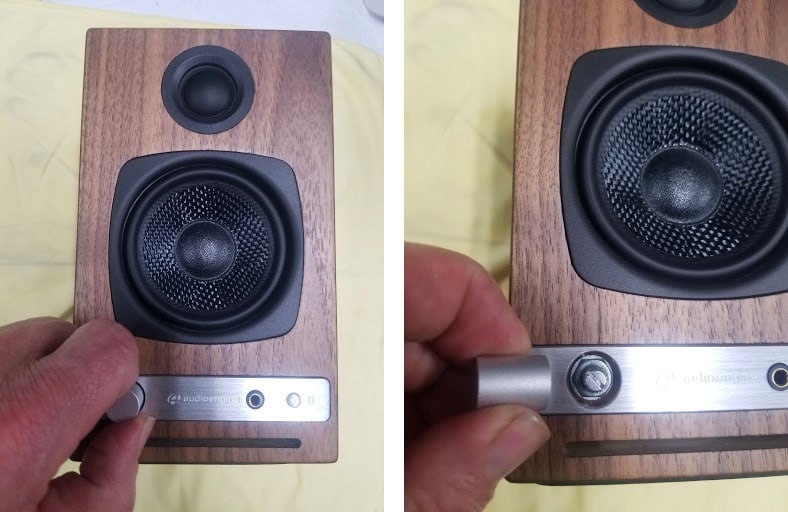
- The process for replacing a volume encoder begins with pulling the volume knob straight back from the encoder shaft

- Make sure the rubber insert stays with the volume knob -

- The volume encoder shaft should look like so before proceeding -

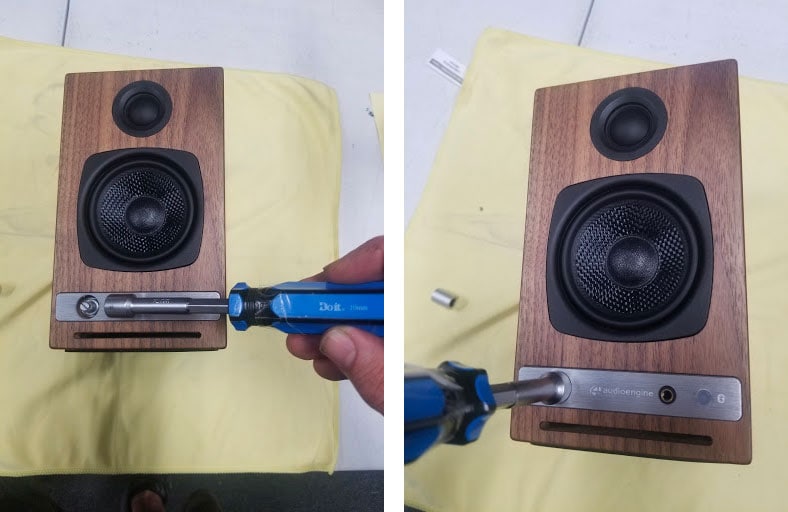
- Using a thin-walled 10mm socket, remove the lock nut fastening the encoder to the front of the speaker cabinet -

- Once you have removed the amp backplate on the back of the active speaker, make sure to remove the encoder wiring terminal clip from the amp circuit board. You can then fully uninstall the encoder assembly by pulling back the encoder shaft from the inside -

- Finally, the IR receiver can be removed by using a long-necked Phillips PH1 screw driver to remove the 2 screws fastening the IR receiver on the inside of the cabinet -

After fully removing the faulty encoder, the replacement can be installed following these steps in reverse order before finally connecting the wiring clip to the amp circuit board and fastening the amp backplate back onto the active speaker.
The process can be a bit cramped if you wish to do as little disassembly as possible, or a bit easier if you are comfortable moving parts to give yourself more workspace. The sound damping insulation normally overlaps at the bottom of the active cabinet. This can be peeled back similar to the reference picture attached. The crossover is mounted underneath this insulation (If process being done on an HD6) and is perhaps the most obtrusive part when replacing a volume encoder. This has two Philips head screws mounting it to the base of the cabinet along with an adhesive pad to reduce noise vibration. It is possible to remove the two screws and lift the adhered crossover up from the base of the cabinet momentarily to get better access to the IR receiver and volume knob assemblies at the front. If you'd rather not risk damaging anything, the IR receiver can still be unscrewed from the inside of the cabinet with a long-necked Phillips PH1 driver. The volume knob is loosened from the outside of the cabinet with a thin-walled 10mm socket found by pulling the volume knob straight back from the encoder shaft. Ample lighting will also make this work easier
Each Speaker is 11.25"H x 7"W x 10.5"D
All Optical audio is considered a "fixed" output, meaning volume will not attenuate from the TV remote. If you have an HD5/HD6 you can use the Audioengine remote for this. Fo
We take great pride in our products, and go through great lengths to ensure consistency and quality. For that reason, this item was randomly selected for an additional step of Quality Assurance.
You can do this using powered speakers like our A2+s, HD3s, HD4s, A5+s, and HD6s. For this, you'll connect the W3 sender to the RCA output on the left speaker, using a 3.5mm stereo-mini to RCA "Y" cable. Then connect the W3 Receiver to the input on your S8. You can either use a 3.5mm stereo-mini to stereo-mini cable for this, or another 3.5mm stereo-mini to RCA "Y" cable; either will work fine. Both W3 units will need to be powered from a USB port. You can use USB AC power adapters, or if the powered speaker you're using is our A5+ Classic model, you can use the USB port on it's rear panel for the W3 sender. The same would apply to the S8 subwoofer if you have our current 'Gen II' model that has a USB port on the rear panel.
The speakers we offer that are designed to have a remote control are the A5+ Classic, A5+ Wireless and HD6.
The following systems do NOT support a remote control: 512, A1, A1-MR, A2+, B2, HD3, HD4.
There can be only 1 active pairing at a time.
Yes! As long as your speakers have an analog output (either RCA outputs or a 3.5mm stereo mini output), you can absolutely connect the S6 to your powered speakers. With the exception of the B2, all of our powered speakers will have the outputs needed to connect the S6, this includes the original A2 and A5 models.
You can simply use RCA cables to connect the S6 to the A2+, HD3, HD4, A5+, A5+Wireless, and HD6 speaker models.
For the A1 and A1-MR speakers, you can use one side of your stereo RCA cables. Just use the left/white RCA cable, and leave the red RCA disconnected to prevent an accidental ground loop.
** Please note: a 3.5mm/stereo mini cable will not work with the ‘Subwoofer’ output on the back of your A1/A1-MR speakers. **
No, there are no firmware updates or special drivers needed unless you own our A1-MR multi-room speakers or our B-Fi multi-room wireless streaming device.
If a firmware update is released for the A1-MR or the B-Fi, you will be notified of the update the next time you open the Audioengine Control App. If an update is needed, simply click "update" on the DEVICES page next to the product that needs to have the firmware update applied. The app will handle the rest of the process from there!
Standard plug-n-play drivers that are provided by your computer's OS are utilized when using the USB input on our A2+, HD3, and HD4 speaker models.
And all of our Bluetooth speakers/products are compatible with any device that supports Bluetooth, and the A2DP profile for streaming stereo audio. This includes most smartphones, tablets, and computers. For computers that don't include Bluetooth support out of the box, you can simply add a USB Bluetooth adapter.
When using the optical input of the D1 DAC or the HD6 speakers, you'll need to make sure your TV's audio output is set to PCM (not Dolby, DTS, or 5.1/surround). Special hardware is needed to process Dolby audio signals. If your TV is set to Dolby, it's likely you'll hear some audio but it will be intermittent in nature with dropouts. Once the output is set to PCM, this should resolve the issue. Check with your TV manufacturer for directions on how to make this adjustment.
Applicable to our A2+, HD3, HD4, A5+, A5+Wireless, and HD6 speakers.
Start with power cycling your speakers by turning them off and then back on. From there:
- Determine if the distortion is due to your source by disconnecting all source devices from the speakers.
- Please make sure all of your connector cables are in working order. Try different cables as well as a different source device.
- Please try using each input available (mini-jack, RCA, USB, as well as Bluetooth), one at a time, to see how the speakers react. If the distortion is unique to one speaker, when testing via RCA switch the RCA jacks (red to white and white to red) to see if the issue remains in the same channel.
- Make sure it is not a power issue by trying a power outlet that is on a different circuit.
If the issue persists, please click on the following link and then click on the dropdown to submit an email to our Support team:
When doing so, please copy and paste the above troubleshooting steps along with the results of each and include this information when contacting us.
Applicable to our A1, A2+Wireless, B2, A5+Wireless, and HD6 speaker models
Turn on the speakers using the power switch located on the rear panel. The speakers will automatically go into Bluetooth "pair mode" and the Pair button on the back panel should start flashing.
- On your source device (phone, tablet, laptop, etc), turn on Bluetooth and go to Bluetooth preferences.
- Select "Audioengine (your speaker model)" from the list of available devices to pair and connect. The Pair indicator on the back panel should now be solid. Play your music and adjust the volume levels on the speakers and your device.
To add additional devices put the speakers back into pair mode by disconnecting them from your device or by pressing and holding the Pair button until the pair indicator starts flashing.
Our speakers can wirelessly connect to only one device at a time, however it will remember up to six different devices.
All digital audio sources will ultimately need to be converted to analog to provide sound through any speaker system. Any optical/Bluetooth input will pass the digital signal on to the HD6's internal digital-to-analog converter (DAC), while the RCA/3.5mm inputs are already analog and have been converted by the built-in DAC in your source. So it's a question of which DAC sounds best to you. We would recommend testing each input separately to see which one you prefer!
Applicable to our A1, A1-MR, A2+, HD3, HD4, A5+, and HD6 speaker models
If one of your speakers is not working (whether it be the left or right speaker), we would recommend the following troubleshooting steps:
Start by power cycling your speakers by turning them off and then back on. From there:
- Check to make sure the speaker wire connecting the left and right speakers is connected according to proper polarity (Red to Gold, Black to Silver) on both ends.
- Please make sure all of your connector cables are in working order. Try different cables as well as a different source device.
- If you are using any other devices in line with these speakers, please temporarily remove them from your setup and connect the source directly to the speakers
- Please try using each available input, one at a time, to see how the speakers react. When testing via RCA swap the RCA jacks (red to white and white to red) to see if the issue remains in the same channel.
If the issue persists, please click on the following link and then click on the dropdown to submit an email to our Support team:
When doing so, please copy and paste the above troubleshooting steps along with the results of each and include this information when contacting us.
Yes, you still need to connect the active/left speaker to the passive/right speaker via the included speaker wire. The passive right speaker has no power source of its own and relies on the amplified signal coming over the wire.
Once you have set up your HD6 speakers, turn them on using the power switch on the rear panel. The speakers will automatically enter their "pairing mode" when first turned on. The Bluetooth LED on the back of the powered speaker will blink during this time frame.
While the LED is flashing, go into your source device's Bluetooth menu and then search for nearby Bluetooth devices. Select the HD6's from the list of nearby devices to pair and connect with the speakers. Once your source device has been paired with the speakers, the LED light on the back should remain solid and on.
At this point, select your favorite tunes and hit play! Keep in mind that you can adjust the volume by using your source device's volume control along with the volume knob on the front of the speakers. If the volume seems too low, check to make sure the volume is set to an appropriate level with both your source and the speakers.
If you'd like to switch to another Bluetooth source, either press and hold the LED button on the back of the HD6's until it starts flashing OR go into the Bluetooth menu of your source device and disconnect from there. Once the LED on the HD6's begins to flash again, you can pair a new Bluetooth source to the speakers.
The Bluetooth 5.0 receiver found in the latest builds of the HD6's will support the following Bluetooth codecs: SBC, AAC, aptX, and aptX HD.
Though the HD6's are capable of 'remembering' up to 6 devices, you can only have 1 source device (phone, laptop, computer, etc) actively paired via Bluetooth with the HD6's at a time.
The HD6 Bluetooth LED light will blink and be discoverable for 5 minutes once powered on. If in that 5 minute window the speakers are paired to a Bluetooth source, the light will go solid. After the 5 minutes is up, the light will turn off and it will no longer be discoverable and able to pair to new sources, but it will still be on. If the LED is off, a previously connected device can still pair to it at any time from within their device's Bluetooth menu.
If you want to pair to to a new device, just tap the LED light once more and it will blink and be discoverable for another 5 minutes. If you're paired to something and want to disconnect from the HD6's, you can hold the button down the Bluetooth LED for a few seconds before it disconnects.
The HD6's do not come with a dedicated headphone out. If you wanted to use headphones with our HD6 speakers, you'd want to incorporate a headphone amp, like our D1 24-bit DAC/Headphone Amp, into your set up. When using a device like this, the audio would be cut off to your speakers when your headphones are plugged in, allowing you to enjoy the audio coming through the headphones without any interruption from your speakers.
View the short video below to see one of our quality control technicians connect the HD6 left and right channels.
In countries such as the US, Canada, and Japan the fuse is a 110-120V AC power is a 5mm x 20mm 3.15 amp @ 250 - slow blow fuse. If you are outside those mentioned countries, please use a 220-240v is a 5mm x 20mm 1.6 amp @250 - slow blow fuse.
Absolutely! You can connect any Audioengine speaker with an analog output to any Sonos product that has the Line-In feature. You can also connect any Audioengine passive speakers into an existing Sonos system using the Sonos Amp.
Absolutely! To do so:
- Open the Alexa App on your smartphone or tablet (Apple link | Google Play Link)
- Tap the “Devices” icon and select the Echo/Alexa device you want to connect to speakers
- Select “Bluetooth Devices”
- Select “Pair New Device”
- Find your Audioengine wireless speaker on the list of available Bluetooth devices, and select it
Your Bluetooth connection works by projecting the sound from your phone. So, if your ringtone volume is on, that sound will come through Bluetooth too. This is a simple fix by changing the phone's ringtone settings to either vibrate or silent.
This sometimes happens when the speakers and turntable share the same surface. The vibrations from the speakers playing feedback into the turntables stylus, causing unwanted noise. The best way to mitigate this would be to place the speakers on a different surface. If that's not an option, we'd recommend trying out some isolation stands. For larger speakers like A5+ and HD6, the ones made by Isoacoustics work well.
Yes! We incorporate all the relevant functions and features from Bluetooth 5.0 that apply to our products! These features include; extended range, low latency (so that video and audio sync properly), as well as higher level aptX-HD, aptX, and AAC codecs (with the exception of our 512 portable speaker which supports SBC only). Keep in mind that the capability of the source is what controls the Bluetooth experience.
All turntables require a phono preamp stage before connecting to Audioengine speakers. Many turntables have this built-in , while others do not and would require an external phono preamp. Check the turntable manufacturer’s website or user manual. Some turntables may even include Bluetooth, in which case you can pair and connect them to the speakers wirelessly!
If the left speaker is in an easy to reach location, you can certainly use the physical knob to set volume. If not though, it's perfectly fine to set the speakers to a good volume and then adjust from your source moving forward. Every setup is different, so some experimentation will be necessary to find your preferred settings.
Though overall latency can be affected by some external factors (including things like signal strength, how well the source device's manufacturer has implemented it's Bluetooth, and even simply from being physically further away from the speakers) Audioengine Bluetooth products have very low latency when compared to most Bluetooth receivers, 30ms or less.
Here are some tips you can use to minimize any latency issues you may run into with your Bluetooth setup:
1) Try restarting both your device as well as the speakers (by switching them off, and back on, with the power switch on the rear of the speakers).
2) Check to make sure your source device is running the most up to date version of software available.
3) Try disconnecting from and forgetting the your Bluetooth speaker or device through your source’s Bluetooth settings, and then re-pair to your Bluetooth speaker/device.
4) If you have multiple apps or windows open when the delay occurs, try closing all of the apps that are not currently in use. The more multitasking your system is having to do, the greater the potential delay in audio when using Bluetooth -- this would apply to both your smart phone and computer.
5) When using your iPhone, we've found that resetting your network settings can help improve the overall functionality of Bluetooth with your device -- including the latency.
For starters, you will need to use a powered subwoofer with analog inputs (either RCA or 3.5mm). Simply connect the subwoofer to the RCA outputs found on the back of the HD6 speakers. If your subwoofer only has a 3.5mm input, you could pick up a 3.5mm to 2-Male RCA Adapter cable to bridge the connection between your subwoofer and the HD6 speakers.
Please refer to the image below, using our S8 as a reference:
Yes! An AC wall outlet near the HD6 is all you need to power the W3 wireless receiver.
The HD6 is not officially supported by any universal remotes. However, you can use a learning remote to copy the signals being sent by the HD6's remote. Check with the manufacturer of your remote to find out if it supports learning IR codes.
-Both analog (3.5mm mini-jack and RCA) inputs are "open" or active, so you can leave 2 audio sources plugged in at the same time.
-The USB (Optical for HD6) and the Bluetooth module share the same DAC (Digital to Analog Converter) If connected to both, the Bluetooth connection will take precedence. If you're using USB (Optical for HD6) for example, and start using Bluetooth, USB (Optical for HD6) will mute and Bluetooth will take over. If you pause or disconnect from Bluetooth the speakers will automatically switch back to USB (Optical for HD6) after a few seconds.
*Please note, if you have a digital (Bluetooth, USB or Optical) and or multiple analog sources connected and streaming you are able to hear the input sources if they play simultaneously.
Bluetooth has a delay of about 30ms (milliseconds) so you can watch videos from Youtube, for example, and stream the audio through your HD6 without any noticeable lag between the video and audio.
The HD6 are capable of providing audio playback for any and all audio that your source device is capable of playing. Your source device would be the device your speakers are currently connected to either via the analog inputs, Bluetooth, or the optical cable. They will play back audio from any streaming service including but not limited to:
- Tidal
- Spotify
- Pandora
- iTunes/Apple Music
- Amazon Music
- YouTube
- Sirius XM
- Qobuz
Possibly, it depends on the computer's operating system, sound capabilities and connection type. If your computer is capable of doing so, our speakers will not prevent this type of use in any way.
For example, if you have a Mac running Snow Leopard or later, you can create a multiple output device to accomplish this. See the link below for how-to instructions on Apple’s site:
- If it's on and solid, this means the HD6 is powered on, and currently connected to a Bluetooth-enabled device.
- If your source is currently sending the HD6 an aptX signal, the LED indicator on the rear panel will illuminate orange instead of white.
- If it's on and blinking, this means the HD6 is powered on but not currently connected to a device.
- If it's off (and HD6 is powered on), this means Bluetooth is in standby and not connected to a device. The HD6, however, is still visible to your device, so simply connect using your device and the HD6 will automatically wake up.
You can absolutely still use the HD6 and it will sound great! AptX is a high-quality Bluetooth audio codec that works really well. In addition to mandatory support for SBC, Bluetooth also includes optional support for many other codecs, like MPEG-1, MPEG-2, MPEG-4, and AAC, all of which have their own advantages, and some of which sound very close to AptX.
No extra software or drivers are needed. The HD6 is compatible with any device that supports Bluetooth, and the A2DP profile for streaming stereo audio. This includes most smartphones, tablets, and computers.
Once your HD6 is paired and connected, then open any app (iTunes, Spotify, Amarra, etc.) - or online players such as Youtube - and it will automatically play your music through Bluetooth once you've selected what you want to hear.
It's pretty easy! Our powered speakers are an all-in-one solution with no extra amps or components needed! All you need to do is unpack the speakers, place them where you want, and then plug in the AC cord. Next, connect the powered speaker to the right passive speaker using the included upgraded speaker wire with banana plug tips. Finally, plug in your music (cell phone, turntable, computer, laptop, etc.) with the supplied cables or via Bluetooth and you're ready to go!
Here is a quick video that can be used as a reference.
(Please note - there is no audio associated with the video.)
Yes they do! They are equipped with a power-saving circuit that turns off the speaker's final stage amp. This idle mode activates right after you stop playing music. Due to this power-saving function, it's perfectly fine for the speakers to stay on all the time!
Audioengine speakers can be easily connected to your TV set as long as there are analog outputs available. Any of our speakers will provide a greatly enhanced TV audio experience with a wider soundstage and better imaging than most sound bars.
Setting up your Bluetooth turntable with your Bluetooth-ready Audioengine speakers/components should be simple! First, you would also need to make sure your Audioengine Bluetooth device is on, in pair mode (LED light flashing), and near the turntable. Next, you would need to use the pairing button to send the turntable into pairing mode. Depending on the turntable, you will need to either press and release the turntable's pair button or press and hold it; for example, on the Audio Technica AT-LP60-BT you would need to hold the turntable's pairing button for about two seconds, until the light flashes different colors. Once the turntable is in pairing mode, it will search and connect to the nearest available Bluetooth device. Once the turntable if paired and connected to your Audioengine Bluetooth device, the pair light on the receiver should turn solid.
If the Bluetooth LED is illuminated orange that means you are streaming in aptX HD which is a higher grade of Bluetooth signal.
Yes! We've been notified that the Android App ZappIR supports the A5+s, so if you have a phone with an IR blaster like the HTC One or the Samsung Galaxy S4 you can use the App to raise or lower the volume of your A5+s or HD6s with your phone!
If you’ve connected your turntable to your speakers and the volume is low, one of two situations may be happening:
If you have a turntable with a built-in phono preamp, such as the Audio-Technica ATLP120 or the Music Hall USB-1, the output may be in the wrong setting. Double check and make sure the switch is set to “line” instead of “phono.” Be careful to keep the volume of your speakers low as it can be quite loud if you had to switch it to "line".
Your turntable could also not include a built-in phono preamp, such as older turntables. If your turntable does not include a built-in preamp, you will need to add an external preamp to bring the signal up to a line level signal. We don’t have any recommendations on a particular brand or model preamp to use with this setup.
There do exist USB-to-optical converters that should work in a setup like this, though a product like this isn't very widespread. We don't really have any recommendations on a specific brand or model to use, but a quick Google/Amazon search should yield results.
Another solution is to use an external DAC, like our D1 24-bit DAC, connected to the USB port on your computer and plug it into either of the analog inputs of your HD6s.
Even though the HD6 has a built-in Bluetooth receiver, the HD6 are extremely versatile and can be used with a number of different devices, both digital and analog. There two analog inputs, a mini-stereo and RCA input, on the rear panel so you can directly connect any product with a line-level/preamp audio output, such as a turntable. The HD6s also have an optical input that utilizes the speakers' built-in DAC, so any source that has a digital optical output can be used directly with the speakers, such as the optical output of your television or computer.
Both analog inputs are "open" or active, so you can leave 2 audio sources plugged in at the same time with no need to flip any switches! Both the optical input and the bluetooth module share the same DAC so using the optical input on the HD6 as well as streaming to the speakers via bluetooth would utilize the built-in DAC. This means that the HD6's bluetooth receiver takes priority, so if you start playing audio over Bluetooth the optical input will mute; optical will resume automatically a few seconds after Bluetooth is paused or disconnected.
To replace the battery in your HD Series remote, you'll need a paperclip or similar.
- Insert the paperclip into the hole on the back of the remote and push. The battery/button assembly of the remote will pop out.
- Use the paperclip to push the battery out of the battery clip. Note the orientation of the battery when removing it.
- Slide the new CR2025 battery into the battery clip. The positive (+) side of the battery should face away from the PCB.
- The battery/button assembly is held in place with magnets, so once you've replaced the battery, slide it back into place.
The HD6 include some pretty significant upgrades over the A5+s. Among these are:
- Larger redesigned woofer with die-cast aluminum frame for extended bass response with fast dynamics
- New larger custom 1” tweeter for an open and realistic high end and an extraordinary soundstage
- Thicker, low-resonance cabinet
- Upgraded crossover components
In addition to the performance related upgrades, the HD6s also feature:
- Bluetooth aptX and digital optical inputs
- Real wood-veneer cabinet finish options
- Removable magnetic grills
- Solid aluminum remote control
You may have a loose volume pot. This can happen when the nut that holds the volume pot in place becomes loose. This can be easily accessed and tightened without opening the speakers up. Try this:
1) Pull the plastic volume knob off the volume pot. Depending on how tight it's on, you might be able to pull it off with just your fingers. If not, you may need to cover the knob with a soft cloth and pull out with pliers.
2) Use a deep well 10mm socket (or socket driver) to tighten the nut around the volume pots shaft.
3) Press the plastic volume knob back over the volume pot's shaft, and retest.


