

So you’ve picked out your first turntable, found a few records you love, and you’re ready to start listening. Before you drop the needle, there are a few things worth knowing about how your turntable works.
If you’ve noticed the small weights, dials, and adjustments around your turntable’s tonearm, you might be wondering what they actually do. These components help your records sound their best while protecting them from unnecessary wear.
The good news? Getting everything set up is easier than it looks, and we’re here to walk you through it.
Understanding Your Turntable’s Needle
Let’s start with one of the most important parts of your turntable: the needle, also known as the stylus.
The stylus is the tiny tip that sits inside the grooves of your record. As the record spins, those grooves move the stylus, creating vibrations that your turntable converts into an electrical audio signal.
It’s a surprisingly delicate process, which is why the quality and condition of your needle matter.
A few things to keep in mind:
- Never touch the tip of your stylus with your fingers.
- Keep your records clean to prevent dust buildup on the needle.
- Replace your stylus according to the manufacturer’s recommendations or when it shows signs of wear.
Most beginner turntables come with a stylus already installed, so you shouldn’t need to worry about attaching one yourself. Just remember to remove the protective cover before playing a record.
Tracking Force: Finding the Right Balance
Your turntable’s tracking force determines how much downward pressure the needle applies to your record.
Too much pressure can cause unnecessary wear on your records and stylus. Too little can cause the needle to skip, distort, or struggle to follow the grooves properly.
That’s where your tonearm’s counterweight comes in.
The counterweight is typically located at the opposite end of the tonearm from the needle. By adjusting it, you control how firmly the stylus rests against your record.
How to Adjust Your Tracking Force
For turntables with an adjustable counterweight, the process generally looks like this:
- Find your recommended tracking force. Check your cartridge’s specifications. Many cartridges recommend around 2 grams, but the correct setting depends on your specific model.
- Balance the tonearm. Following your turntable’s instructions, carefully adjust the counterweight until the tonearm floats horizontally without resting on the platter.
- Set your counterweight to zero. If your counterweight has a numbered calibration ring, turn only that ring to zero without moving the weight itself.
- Dial in your tracking force. Rotate the entire counterweight to the recommended tracking force.
That’s it! Your stylus should now apply the appropriate pressure to follow your records’ grooves.
Some turntables handle this adjustment automatically or arrive preset from the factory. Always check your model’s instructions before making changes.
Anti-Skate: Keeping Your Needle on Track
You might have noticed another small dial near your tonearm labeled “anti-skate.”
When a record spins, friction creates a force that tends to pull the tonearm toward the center of the record. Anti-skate applies a counteracting force to help your needle track the groove more evenly.
Without the right adjustment, your stylus may experience uneven pressure against the groove walls, potentially affecting playback quality and increasing wear.
How to Adjust Anti-Skate
Fortunately, this adjustment is usually straightforward.
On many turntables, you’ll start by matching the anti-skate setting to your tracking force.
For example, if your tracking force is set to 2 grams, you would typically start with an anti-skate setting of 2.
Your turntable’s manual will provide the correct instructions for its particular mechanism. Some models use a dial, others use a small hanging weight, and some handle anti-skate automatically.
Once you’ve made the recommended adjustment, you’re ready to move on.
Cartridge Alignment: Does Your Needle Need Adjusting?
Another term you might encounter when researching turntables is cartridge alignment.
Your cartridge holds the stylus, and its position determines how accurately the needle follows the grooves as it moves across your record.
Proper alignment helps reduce distortion and allows you to hear more of the detail in your music.
You may also hear about stylus overhang, which describes the position of the stylus relative to the tonearm’s geometry and the turntable spindle.
If your turntable came with a pre-installed, factory-aligned cartridge, you generally won’t need to adjust this yourself.
However, if you eventually replace or upgrade your cartridge, you’ll want to check its alignment using an appropriate alignment tool and your turntable’s instructions.
For now, there’s no need to make unnecessary adjustments to a properly aligned cartridge.
Keeping Your Needle and Records Clean
Now that your turntable is properly adjusted, there’s one habit worth developing early: keeping everything clean.
Dust and debris can accumulate on your records and stylus, interfering with playback and contributing to unnecessary wear.
A carbon fiber record brush is a great way to remove loose dust before listening. For your stylus, use a dedicated stylus brush and gently brush from the back of the cartridge toward the front, following the manufacturer’s recommendations.
Avoid touching the needle or using household cleaning products.
Taking a few seconds to care for your records and stylus can make a meaningful difference in how they sound and how long they last.
Ready to Play Your First Record?
With your tracking force, anti-skate, and stylus taken care of, you’re ready for the fun part.
Place your record on the platter, select the correct speed, and gently lower the tonearm using the cueing lever.
Listen for any unusual skipping or distortion, but don’t feel like you need to make adjustments every time you play a record. Once your turntable is properly calibrated, you should be able to enjoy your collection without constantly tinkering with it.
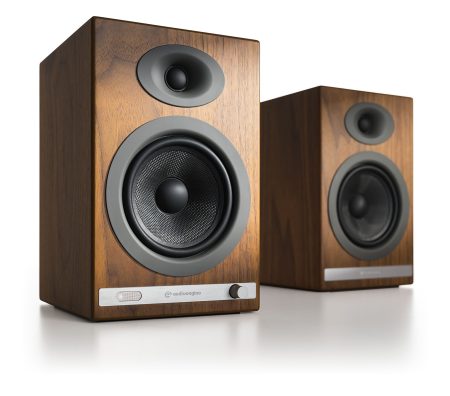
And remember, your turntable is only one part of your listening experience. Pairing it with a good set of powered speakers, like an Audioengine Home Music System, helps bring out the detail and character captured in your favorite records.
Whether you’re listening to your first album or building a collection that fills an entire shelf, a little understanding of your equipment goes a long way.
Still Shopping for Your First Turntable?
If you haven’t picked out your turntable yet, we’ve made that easy, too.
Our Turntable Guide walks you through what to look for, how to choose between wired and Bluetooth connections, and how to build a complete setup with Audioengine Home Music Systems.