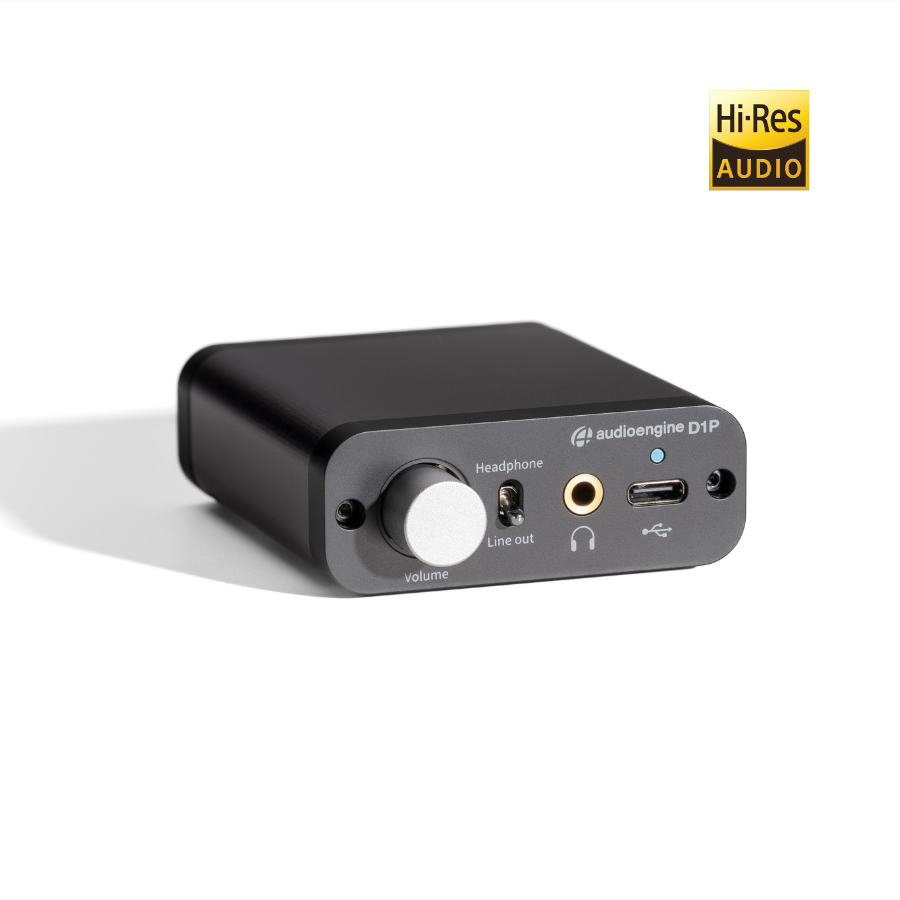
D1P 32 Bit Portable Headphone Amplifier & DAC
Technical Specifications
General specifications
DAC Chip:
SA9312+ES9219C
Input bit depth:
Up to 32 bits
Input sample rate (USB):
PCM Max. 32bit 384KHz, Max 24bit 192KHz
DSD Support:
DSD 64, 128 (DOP), DSD 256 (Native)
MQA Rerender:
8X
USB device class:
UAC 2.0
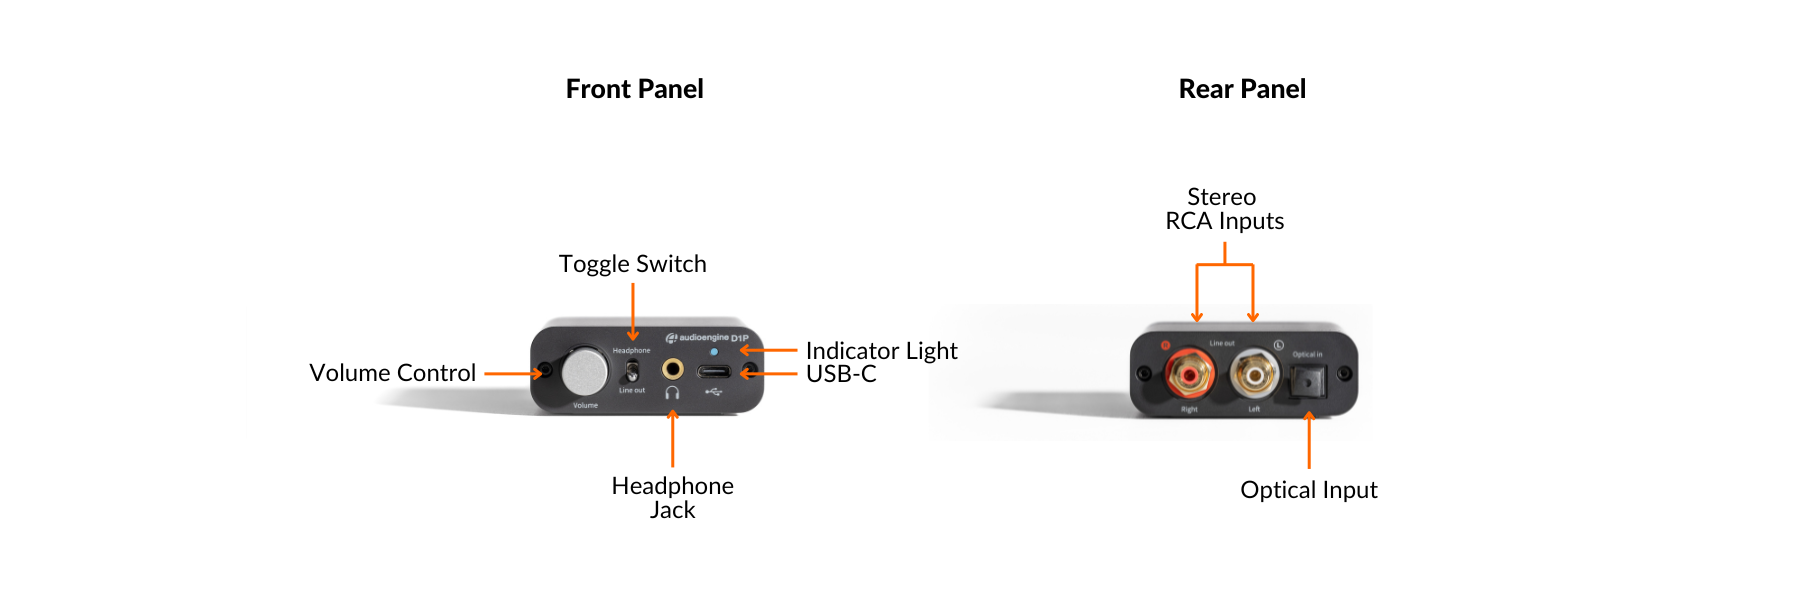
Inputs:
USB Type-C
S/PDIF Optical (Max 24bit 192KHz)
Toggle Switch for input selection
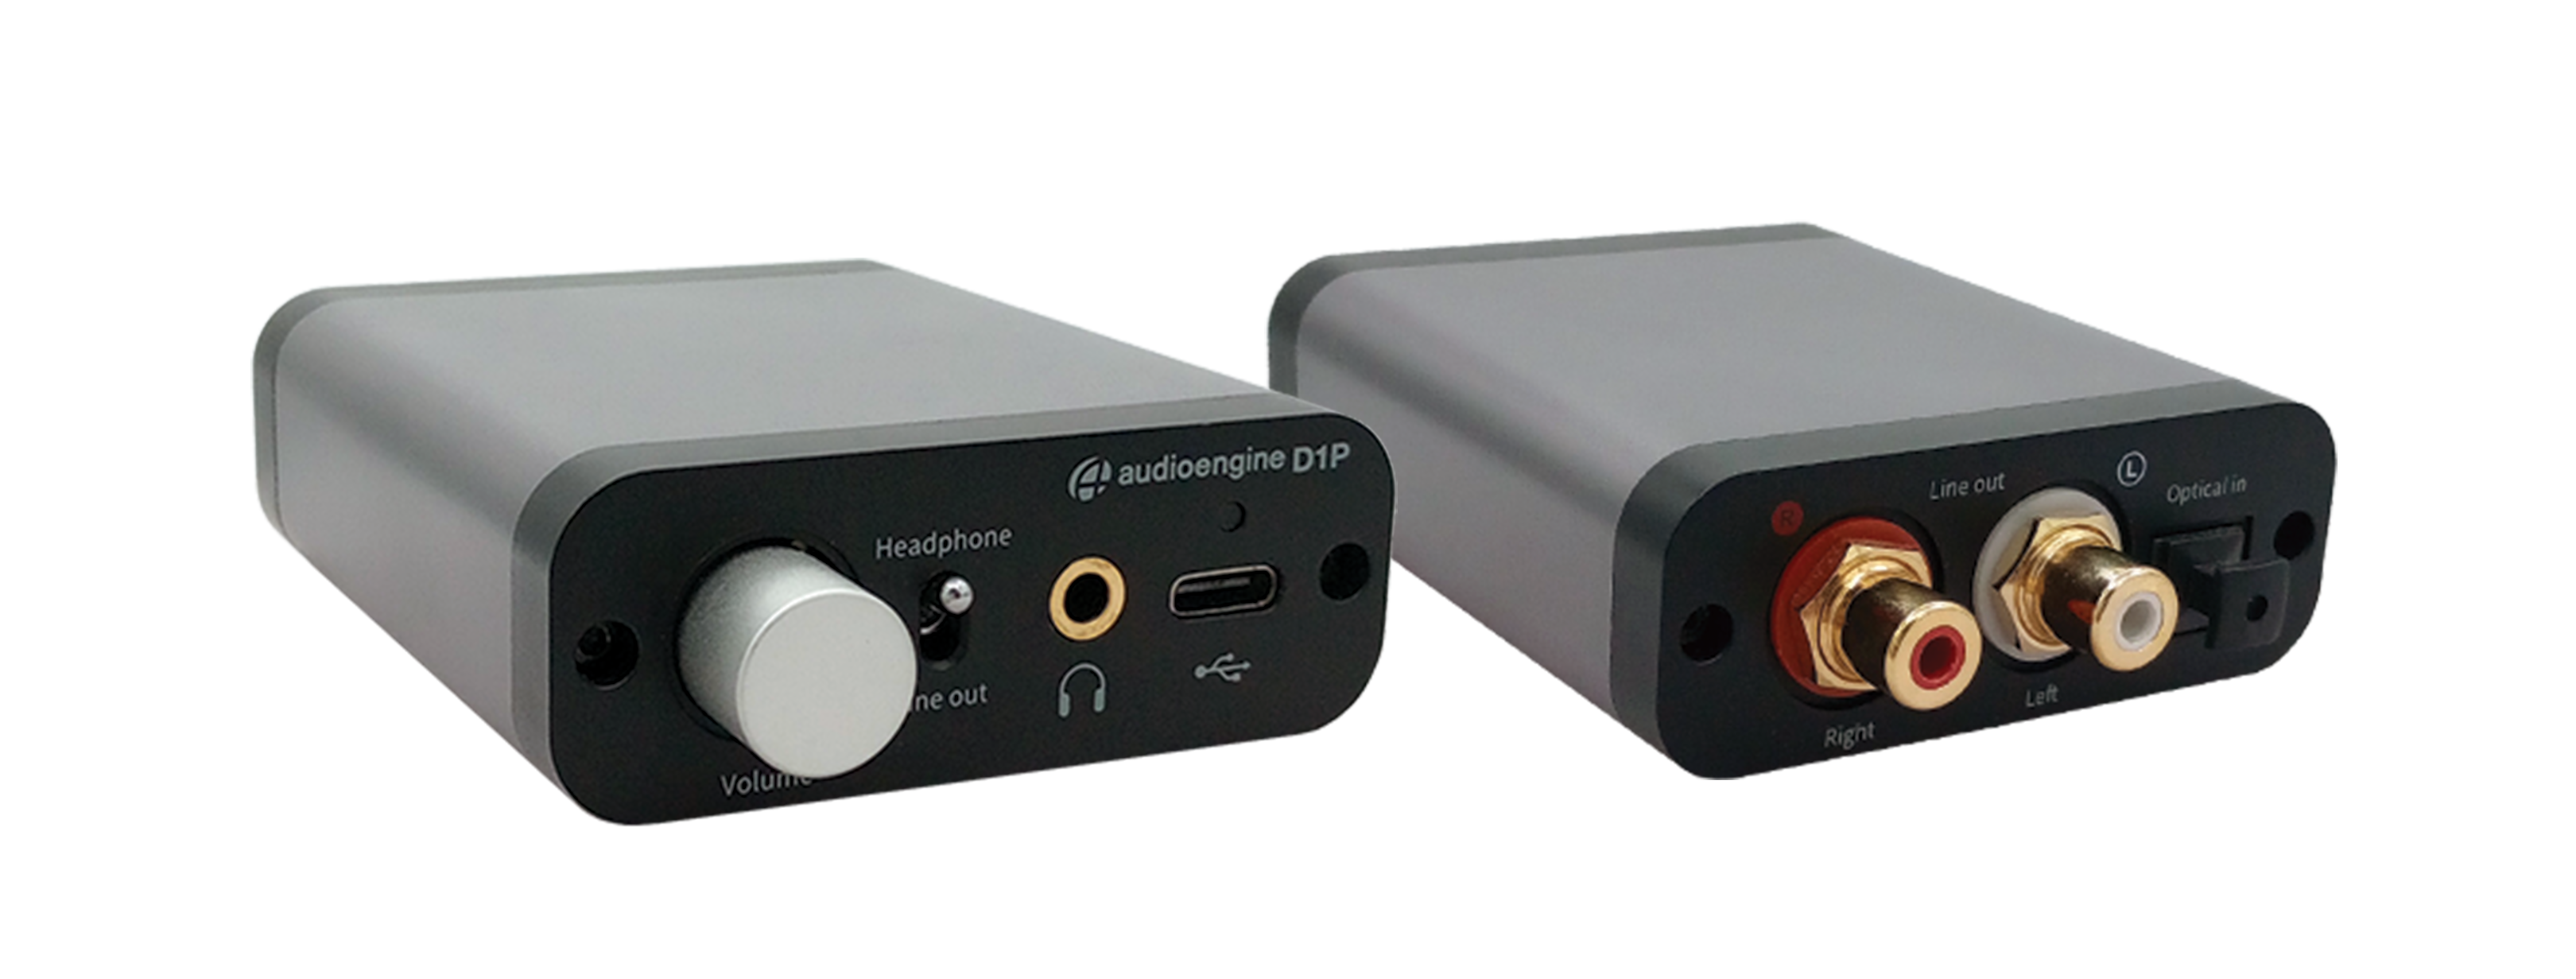
Outputs:
Standard 3.5mm headphone port for headphones and headsets
RCA
SPDIF
Full-scale output level:
Max. 2.05Vrms @ 10K default
Output impedance:
<0.5R @ Headphone, 47R @ RCA
Recommended headphone impedance range:
10 Ohms ~ 600 Ohms
Frequency Response:
20Hz-40KHz +/-0.1dB
Signal-to-Noise Ratio (SNR):
121dB (10K)
Power Requirement:
USB 5V DC
Consumption:
~102mA (normal), ~121mA (with pink noise at 50% volume, 32bit 384Khz)
Indicators:
- White: power/connected
- Green: PCM 88.2-192kHz / DSD64
- Blue: PCM 352.8-384kHz / DSD128
- Purple: MQA
- Green: Optical
Product dimensions
3.0" (7.62 cm) x 2.5" (6.35 cm) x 1" (2.5 cm)
Shipping weight
13.7 oz (0.39kg)
Environmental
Operating Temperature: 32 to 95 degrees F
Non-operating Temp: -4 to 113 degrees F
Relative Humidity: 5% to 95% non-condensing
Included Accessories:
- USB-C cable
- Lighning Cable
- Setup guide
- Microfiber bag
Quickstart Guide
D1P QuickStart GuideTroubleshooting
D1P Troubleshooting TipsThe following troubleshooting tips can help diagnose and correct most concerns with the D1. We have attempted to make this list as comprehensive as possible. So, even though some of these may not apply to your issue, please still go through each one.
- Restart your device and make sure the OS and all related apps are up-to-date.
- Make sure the USB cable and audio cable connections to and from the D1P are complete, and verify that these cables are in working order by unplugging the cables and then reconnecting. Try using the included USB cable if you are not already. If you’re using an Apple source with Lightning port, make sure the adapter cable is a certified Apple cable.
- Remove all other USB devices temporarily from your computer to see how this affects the D1P playback. Audio over USB and bus powering a device can both be somewhat demanding. USB ports can share a bus internally and can also share their bus with devices internally as well. Because of this, some ports may not perform as well as others, so be sure to try each USB port one at a time.
- If using Windows, uninstall the USB driver from your computer. Then disconnect the USB cable to remove the D1Pfrom your computer and plug it back in to allow the driver to reinstall automatically. You can find complete instructions from Microsoft on how to reinstall a plug-and-play device under Windows here.
- If you are using an intel-based Mac, try a NVRAM/PRAM reset. This resets the system configurations for some audio and video related things and can many times help clear up problems related to audio. See Apple’s support page for information on how to do this. Also, be sure to check the App store to see if there's a newer version of Mac OS you could be running.
- Try music with different bit depths and sample rates. On a Mac these settings are under Applications --> Utilities --> Audio MIDI Setup. Try using both 16-bit as well as 24-bit settings.
- Experiment with using a different media player (iTunes, Songbird, Win Amp, Cog, etc.) and different audio file types (MP3, ALAC, FLAC, etc.). And if your media library is located on an external drive or network attached storage (NAS), try playing audio files on your internal local hard-drive.
- When using the optical input on your D1P, be sure that your source device (computer, TV, CD/DVD player, etc.) is set to PCM Stereo output and not Dolby Digital or DTS.
- If you are using a wireless device with D1P, temporarily remove the wireless adapter from the setup and connect the D1P directly to the audio source.
- If possible, try your D1P with a different device to see if something is causing an issue in the current setup.
FAQ's
Table of Contents:
- Introduction
- Main Differences Between Audioengine D1P and AudioQuest DragonFly Cobalt
- Key Specifications
- Key Features
- Overall Design
- Playback Capabilities
- Other Noteworthy Features
- Reliability
- Pros and Cons
Introduction
In the world of high-quality audio playback, digital-to-analog converters (DACs) play a crucial role in transforming digital audio signals into a format that can be appreciated by audiophiles and casual listeners alike. Audioengine's D1P and AudioQuest's DragonFly Cobalt are two standout DACs that offer unique features and capabilities. This analysis will delve into a detailed comparison of these two devices, highlighting their strengths and differences.
Audioengine D1P and AudioQuest DragonFly Cobalt
The Audioengine D1P builds on the legacy of its predecessor, the D1, offering a lightweight and compact form factor with enhanced audio performance thanks to its ESS Sabre DAC chip. It is designed for versatility with a convenient toggle switch to easily swap between your headphones and speakers.
Conversely, the DragonFly Cobalt by AudioQuest focuses on portability and compatibility, featuring a high-performance ESS Sabre digital-to-analog conversion chip and a variety of connectivity options for mobile and desktop devices.
Key Specifications
Audioengine D1P Digital to Analog Converter:
- ESS Sabre ES9219C 32-bit/384kHz DAC chip
- Supported sample rates: PCM up to 32-bit/384kHz, DSD up to 11.2 MHz
- Connectivity: USB-C, Optical, 3.5mm output, RCA output
- No battery required; powered by USB
- Dimensions: 3"W x 1"H x 2-1/2"D; Weight: 0.85 lbs.
AudioQuest DragonFly Cobalt:
- 32-bit ESS Sabre ES9038Q2M DAC chip
- Supported sample rates: PCM up to 96kHz
- Connectivity: USB, 3.5mm output
- Powered by USB connection
- Dimensions: 3/4"W x 1/2"H x 2-1/4"D
Key Features
- Audioengine D1P: Offers a wide range of audio format support, including AAC, FLAC, and MQA, with a variety of connectivity options for flexibility in setup. It also includes an onboard volume knob and a sampling rate indicator.
- AudioQuest DragonFly Cobalt: Known for its compatibility with a wide array of devices, including Windows and Mac computers, iPhones, iPads, and some Android devices. It offers a compact and durable design, with a simple plug-and-play operation.
Overall Design
The D1P continues Audioengine's tradition of high-quality, aesthetically pleasing designs with its compact and lightweight form factor. It is designed to be the perfect audio companion for both office and home environments.
The DragonFly Cobalt features a durable metal construction with a blue hardshell finish, emphasizing portability and durability for on-the-go use.
Playback Capabilities
Both DACs excel in their playback capabilities, with the D1P leveraging the power of the ESS Sabre DAC chip for detailed and nuanced sound across all types of headphones. The DragonFly Cobalt, with its ESS Sabre digital-to-analog conversion chip and high-performance headphone amplifier, offers dynamic and nuanced sound quality.
Other Noteworthy Features
- Audioengine D1P: Supports hi-fi quality audio rendering, including MQA and FLAC, a USB-C and Lightning adapter for universal phone connectivity, optical digital input for TV and home theater connections, and an industry-leading 3-year warranty.
- AudioQuest DragonFly Cobalt: Offers increased processing speed and efficiency, rendering for MQA audio files, and comes with a variety of adapters for connectivity with different devices.
Reliability
- Audioengine D1P: Known for its durability and backed by a 3-year warranty, offering peace of mind for consumers.
- AudioQuest DragonFly Cobalt: Comes with a 1-year warranty and is praised for its build quality and reliable performance.
Pros and Cons
Audioengine D1P:
- Pros: Supports a wide range of audio formats with bitrates up to 32bit, inclduing MQA, FLAC and AAC, versatile connectivity, durable proven design based on the Audioengine D1, 3-year warranty.
AudioQuest DragonFly Cobalt:
- Pros: Compact and portable, compatible with many devices, easy plug-and-play operation.
- Cons: Limited to 96kHz PCM, requires additional adapters for some connections.
Why Digital Audio Quality Matters
Understanding the essence of high-quality components in a DAC reveals why Audioengine's D1P excels. It's not just about hearing music; it's about experiencing it in its fullest, with every note and nuance captured exactly as created in the studio. Visit our blog about digital and analog audio to learn more.
The Company Behind the Sound
Audioengine, founded in 2005, stands as a testament to American innovation in audio technology. With a focus on customer satisfaction, they provide US-based phone support, and a commitment to quality that's hard to beat.
Why Audioengine D1P Stands Out
With its hi-fi audio quality and robust 3-year warranty, the D1P not only meets but exceeds expectations. It represents the culmination of Audioengine's dedication to creating products that deliver music the way it was meant to be heard.
As an American company with deep roots in innovation, Audioengine ensures each customer feels valued with US-based support.
In conclusion, while the AudioQuest DragonFly Cobalt offers a pathway to enhanced audio, the Audioengine D1P leads to the destination of audio perfection. It's more than a DAC; it's a gateway to experiencing music in its purest form, making it the clear choice for audiophiles and casual listeners alike seeking the ultimate sound experience.
Audioengine D1, D1P and DAC3 Reviews from Top Publications
What are the differences?
The Audioengine D1, D1P, and DAC3 each offer a distinct approach to enhancing your music. The D1 is a classic choice for desktop setups, transforming ordinary computer audio into something rich and clear. It’s designed for those who want to elevate their home listening without the hassle of complex equipment.
The D1P takes the D1’s strengths and packs them into a more portable form. It’s ideal for those who need high-quality sound on the go, without sacrificing performance. The D1P’s compact size makes it easy to carry, but its sound remains powerful and precise.
Then there’s the DAC3, the most advanced of the three. It delivers studio-quality sound in a sleek, portable package, perfect for those who demand the best audio performance no matter where they are. The DAC3 is versatile, connecting easily to modern devices while ensuring every note is captured with perfect clarity.
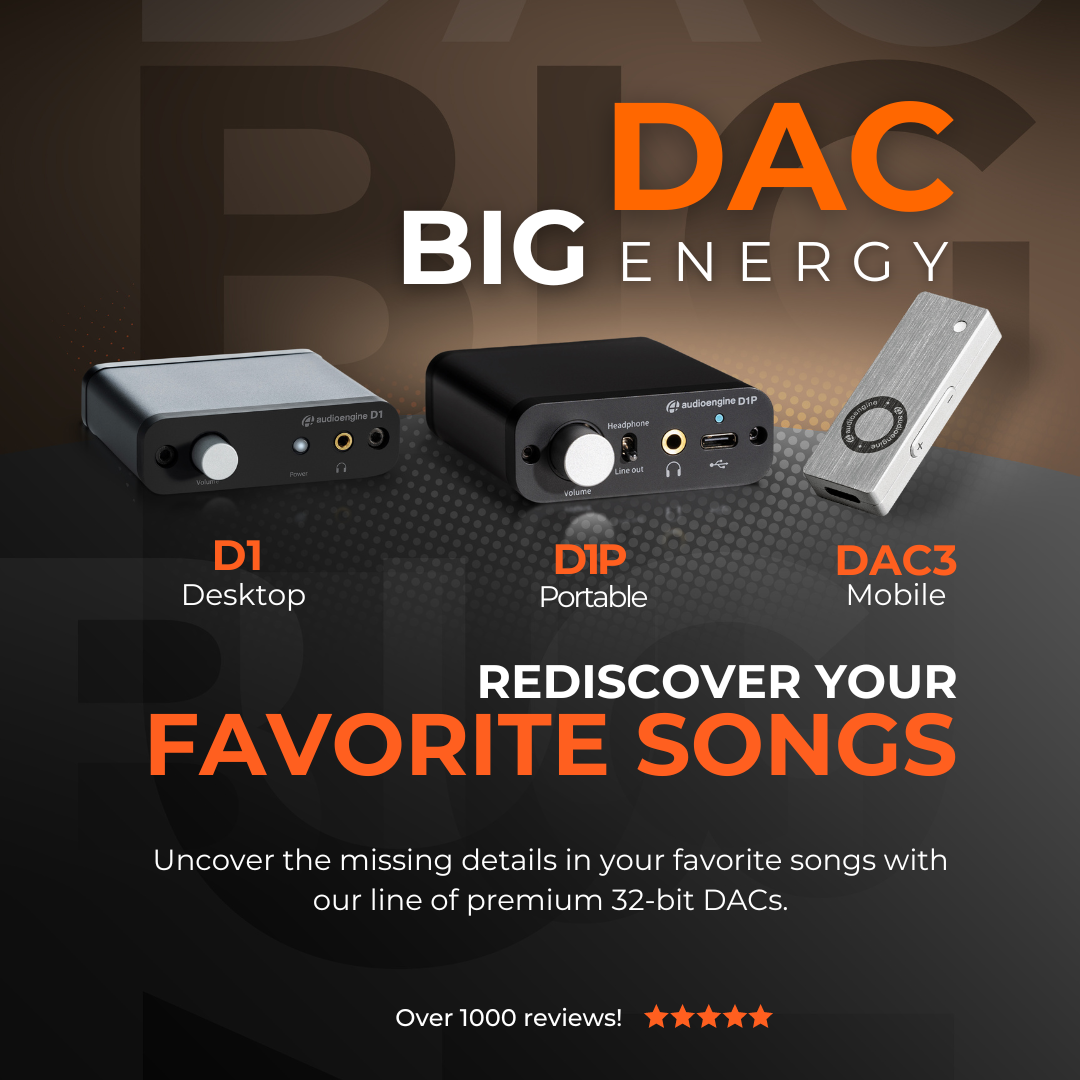
Each model serves a purpose, whether you’re setting up at home, traveling, or simply wanting the best sound possible. Audioengine has designed these DACs to meet the needs of every listener, ensuring that your music always sounds its best.
On this collection page you'll find detailed reviews from industry experts and major publications that applaud Audioengine's D1, D1P, and DAC3.
These reviews collectively affirm the top-tier performance and reliability of our digital-to-analog converters and headphone amplifiers. Each piece is celebrated for its precision engineering and outstanding audio fidelity, offering users an unrivaled listening experience.
Audioengine D1 vs. D1P: Key Differences
The Audioengine D1 and D1P are both 32-bit digital-to-analog converters designed for outstanding audio performance, but they cater to different preferences and use cases.
Audioengine D1 is equipped with the PCM5102 DAC chip, making it a robust choice for desktop audio setups. It features USB and S/PDIF optical inputs and provides outputs for headphones and powered speakers. This makes the D1 an ideal solution for users looking to enhance their home audio systems.
On the other hand, the Audioengine D1P is built for portability without compromising sound quality. It features the ESS ES9219C DAC chip, supports high-resolution audio formats, and offers MQA rendering. The D1P includes a toggle switch for easy switching between headphone and line-out modes and is powered via USB-C, ensuring compatibility with various modern devices like laptops and smartphones. This makes the D1P a versatile choice for audiophiles who seek premium sound quality in a compact design.
By offering features tailored to different applications, both the Audioengine D1 and D1P maintain the brand’s commitment to providing high-fidelity audio solutions, whether at home or on the go.
Audioengine D1P Professional Review:
NEW Audioengine D1P DAC and Headphone Amplifier
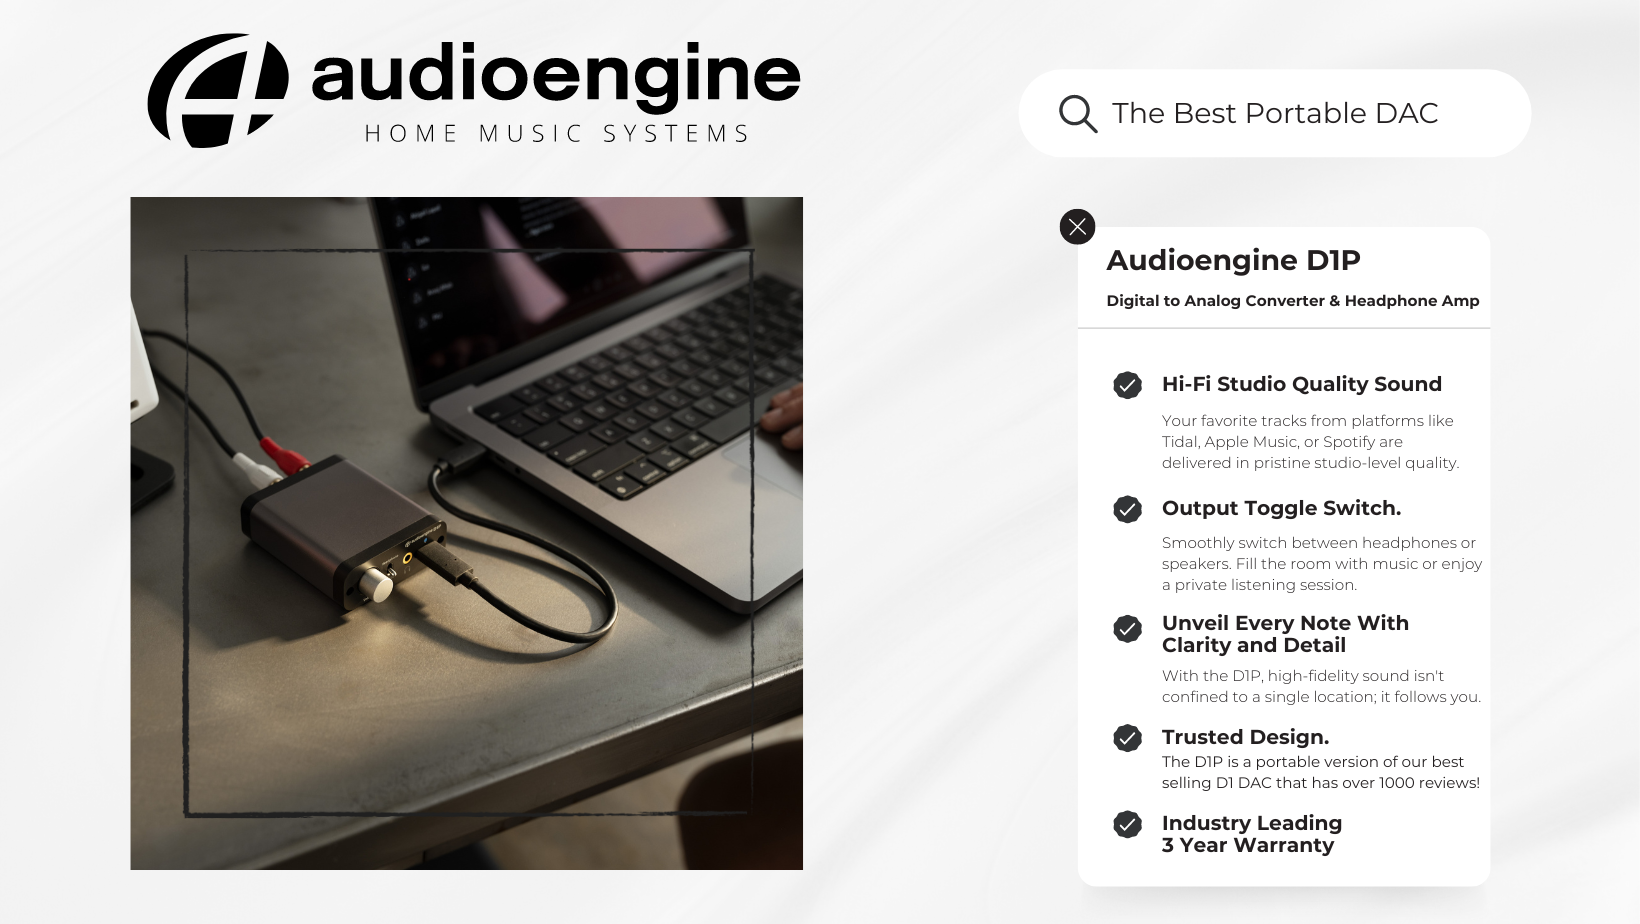
For those demanding the best sound quality, the D1P enhances music streaming to high-fidelity, exceeding the capabilities of traditional audio equipment.
It bypasses the limitations of standard device sound cards, ensuring that your favorite tracks from platforms like Tidal, Apple Music, or Spotify are delivered in studio-level quality. Supporting high-resolution audio formats — including PCM up to 32bit 384KHz, DSD up to 256, and MQA files — the D1P allows you to immerse yourself in the full depth of your music, unveiling every note with clarity and detail.

Audioengine DAC3 and Headphone Amplifier
Professional Review by The Honest Audiophile
More Professional Reviews:
Best DAC and Headphone Amplifier of 2024: Audioengine D1
C-Tech by CalCalist
"The D1 by Audioengine has been honored as the "Best DAC and Headphone Amplifier of 2024" by C-Tech by CalCalist. This prestigious accolade highlights our dedication to excellence and innovation in audio technology. The D1 is praised for its superior sound quality and advanced features, making it the preferred choice for audiophiles seeking the ultimate in audio performance and convenience."
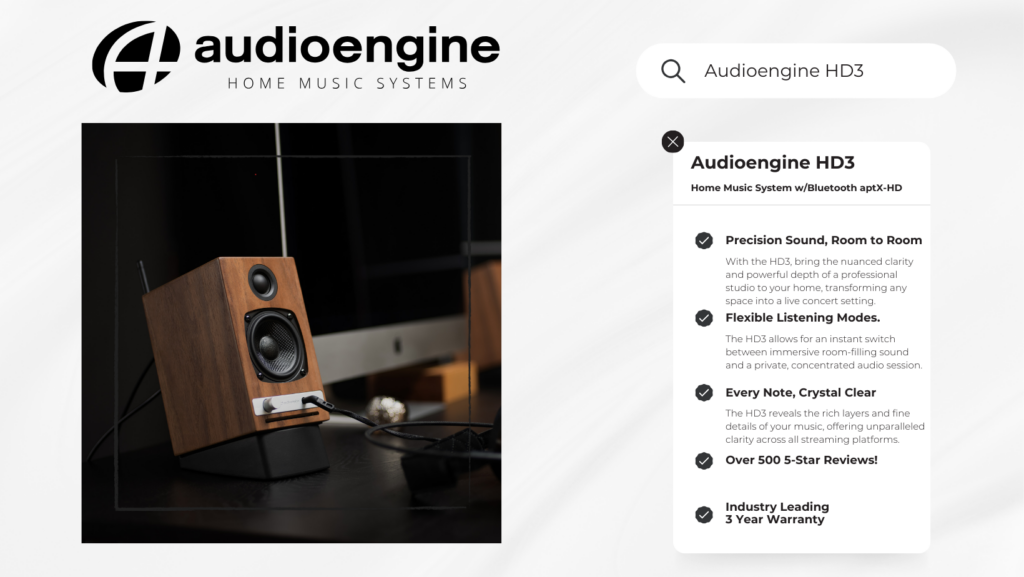
Audioengine HD3 - Hi-Fi Stereo Desktop Speakers w/ Built-in 10K OHM Headphone Amplifier
Reddit R/Headphones
"The HD3 features a PCM5102 DAC and a OPA2134 headphone amp that's separate from the main speaker amp...The 3.5 mm headphone output does exactly what it's supposed to do: power your headphones without coloring the sound.
There was no noticable hiss or distortion at either end of the volume range. All you get is clean power with no coloration.
At $399 -- $319 refurb -- the HD3 is an awesome value that rolls 2 channel powered speakers, a DAC, a headphone amp, and Bluetooth receiver all into compact and attractive package."
DAC Chip:
SA9312+ES9219C
Input bit depth:
Up to 32 bits
Input sample rate (USB):
PCM Max. 32bit 384KHz, Max 24bit 192KHz
DSD Support:
DSD 64, 128 (DOP), DSD 256 (Native)
MQA Rerender:
8X
USB device class:
UAC 2.0
Inputs:
USB Type-C
S/PDIF Optical (Max 24bit 192KHz)
Toggle Switch for input selection
Outputs:
Standard 3.5mm headphone port for headphones and headsets
RCA
SPDIF
Full-scale output level:
Max. 2.05Vrms @ 10K default
Output impedance:
<0.5R @ Headphone, 47R @ RCA
Recommended headphone impedance range:
10 Ohms ~ 600 Ohms
Frequency Response:
20Hz-40KHz +/-0.1dB
Signal-to-Noise Ratio (SNR):
121dB (10K)
Power Requirement:
USB 5V DC
Consumption:
~102mA (normal), ~121mA (with pink noise at 50% volume, 32bit 384Khz)
Indicators:
- White: power/connected
- Green: PCM 88.2-192kHz / DSD64
- Blue: PCM 352.8-384kHz / DSD128
- Purple: MQA
- Green: Optical
Product dimensions
3.0" (7.62 cm) x 2.5" (6.35 cm) x 1" (2.5 cm)
Shipping weight
13.7 oz (0.39kg)
Environmental
Operating Temperature: 32 to 95 degrees F
Non-operating Temp: -4 to 113 degrees F
Relative Humidity: 5% to 95% non-condensing
Included Accessories:
- USB-C cable
- Lighning Cable
- Setup guide
- Microfiber bag
Using Third-Party Software
- Audirvana:
- Audirvana is a high-quality audio player for macOS that automatically switches the sample rate to match the source audio.
- It provides a direct mode that bypasses macOS's audio processing, allowing for bit-perfect playback.
- To use Audirvana:
- Download and install Audirvana from the official website.
- Open Audirvana and go to the preferences.
- Ensure the option to automatically adjust the sample rate is enabled.
- Roon:
- Roon is another powerful music player and library manager that supports automatic sample rate switching.
- It offers advanced features for managing your music collection and provides high-quality playback.
- To use Roon:
- Download and install Roon from the official website.
- Open Roon and go to the settings.
- In the audio settings, configure your DAC as a zone and ensure it is set to automatically adjust the sample rate.
- BitPerfect:
- BitPerfect is a simple and affordable app that integrates with iTunes (Music app) to ensure bit-perfect playback, including automatic sample rate switching.
- To use BitPerfect:
- Download and install BitPerfect from the Mac App Store.
- Open BitPerfect and configure it to work with your preferred audio output device.
- Ensure that automatic sample rate switching is enabled in the settings.
For Windows
To configure your Windows PC to automatically switch the indicator color on your D1P or DAC3 based on the sample rate of the audio file being played, you can use specialized audio playback software that supports this feature. Here are a few options:
Using foobar2000 with WASAPI or ASIO Plugins
foobar2000 is a popular and highly customizable audio player for Windows that can be configured to use WASAPI or ASIO for bit-perfect playback, which allows automatic sample rate switching.
- Download and Install foobar2000:
- You can download foobar2000 from the official website.
- Install WASAPI or ASIO Plugin:
- Download the WASAPI component or ASIO component from the foobar2000 components page.
- Install the component by dragging the downloaded file into the foobar2000 Components window (File > Preferences > Components).
- Configure Output:
- Go to File > Preferences > Playback > Output.
- Select your DAC under the WASAPI or ASIO output device.
- Enable Bit-Perfect Playback:
- Ensure that your DAC is set to "Event" or "Push" mode (for WASAPI) or the correct ASIO driver.
- This configuration will allow foobar2000 to automatically switch the sample rate based on the source material.
Using JRiver Media Center
JRiver Media Center is another powerful media player that supports automatic sample rate switching.
- Download and Install JRiver Media Center:
- You can download JRiver Media Center from the official website.
- Configure Output Mode:
- Go to Tools > Options > Audio.
- Select your DAC as the audio device.
- Under Settings, choose "WASAPI" or "ASIO" as the output mode.
- Set Automatic Sample Rate Switching:
- In the Audio settings, go to "DSP & output format".
- Ensure "Output Format" is checked, then set the sample rate to "Source Sample Rate" or "No Change" to enable automatic switching based on the source file.
Using Roon
Roon is a premium music player with extensive support for high-resolution audio and automatic sample rate switching.
- Download and Install Roon:
- You can download Roon from the official website.
- Configure Audio Device:
- Go to Settings > Audio.
- Enable your DAC as an output device.
- Set Up Playback:
- Ensure that the sample rate conversion settings are set to "Source Sample Rate" to allow Roon to automatically adjust the sample rate.
Using specialized audio playback software like foobar2000, JRiver Media Center, or Roon can help you achieve automatic sample rate switching on your Windows PC, allowing your DAC to read and display the correct sample rate based on the audio file being played. These applications provide bit-perfect playback and ensure that your DAC receives the correct sample rate without manual configuration.
Audioengine operates two websites, audioengine.com and audioengineeu.com. If you go to any other site but these, they are not an Audioengine site. For Canada, Mexico and most of Europe and the UK, we only sell through Amazon. There are also a host of authorized retailers and sites across the US, and they can be found here. For international sales, we have distributors that operate independently, and they can be found here.
What happens if I buy from an authorized site claiming to be Audioengine? Unfortunately, there is not much we can do. We are taking all the action we can to make sure those sites don't get indexed, but we recommend you work with the provider of the card you used to make payment to get your money back.
Step-by-Step Guide
- Open Terminal:
- You can find Terminal in your Applications folder under Utilities, or you can use Spotlight by pressing Cmd + Space and typing "Terminal".
- Execute the Command:
- In the Terminal window, type the following command and press Enter:
bash
Copy code
sudo pkill bluetoothd
- Enter Your Password:
- After pressing Enter, you will be prompted to enter your password. Type your Mac's administrator password and press Enter.
- Note that when you type your password, it won't be displayed on the screen (not even as asterisks). Just type it and press Enter.
By following these steps, you should be able to reset your Bluetooth service on your Mac, which can help resolve connectivity issues with your Audioengine devices or any other Bluetooth peripherals.
All Optical audio is considered a "fixed" output, meaning volume will not attenuate from the TV remote. If you have an HD5/HD6 you can use the Audioengine remote for this. Fo
We take great pride in our products, and go through great lengths to ensure consistency and quality. For that reason, this item was randomly selected for an additional step of Quality Assurance.
No external power is required. The D1P has a minimal power draw and can be powered directly by your mobile device or computer, ensuring efficient operation without significant power consumption. If you do not have a computer close by and are using the optical, any 5v DC USB power supply will work.
The D1P supports a wide range of headphones, from 10-600 Ohms, accommodating nearly all audiophile-grade headphones.
The D1P gives priority to the optical input over USB when dual connected.
Ensure the toggle switch is set to the headphone output and not the line out. This common step is overlooked and is crucial for directing audio correctly.
Key components include a Savitech SA9312 USB, an ESS ES9219C DAC for superior audio decoding, and a Cirrus Logic CS8416 for optical input, ensuring premium performance and sound quality.
The Toslink digital optical input allows the D1P to accept PCM stereo streams from any optical source, like TVs, computers, and media servers, providing flexible and high-quality audio connectivity.
The D1P processes PCM digital audio up to 32 bits and a maximum sample rate of 384kHz. It also supports DSD playback up to DSD128, allowing for high-resolution audio playback.
Yes, the D1P has built-in MQA hardware to complete the final unfold of an MQA audio file, offering a crystal clear listening experience.
The D1P supports MQA, FLAC, PCM, and DSD formats, ensuring it can handle a wide range of high-quality audio files for your listening pleasure.
By bypassing your computer’s internal DAC or sound card, the D1P with its advanced DAC technology and custom audiophile-grade connectors delivers a more expansive and detailed soundstage, enhancing your listening experience across platforms like iTunes, TIDAL, Spotify, and Pandora.
The D1P accepts both USB-C and S/PDIF optical input from any device with a TOSLINK digital optical, for your digital audio sources.
It is powered by your devices through a USB-C connection, with no need for an additional/external power source. This ensures convenient and versatile use across all your digital devices on-the-go, or from your home.
Absolutely, the D1P is engineered to power audiophile-grade headphones effortlessly. Its robust yet portable 32-bit headphone amplifier ensures superior sound quality from even the most demanding headphones.
The D1P works with iOS, Android, MacOS, and Windows devices, supporting any device with a USB or digital audio output, including phones, laptops, and computers.
Audio formats and bitrates are shown by the color of the indicator light on the D1P
White PCM 32-48kHz
Green PCM 88.2-192kHz, DSD64, Optical
Blue PCM 352.8-384kHz, DSD128
Purple MQA Rendering
*When connected to a Mac or PC, the indicator light reflects what your system sound audio output quality is set to, not the bitrate of the specific track you’re playing.